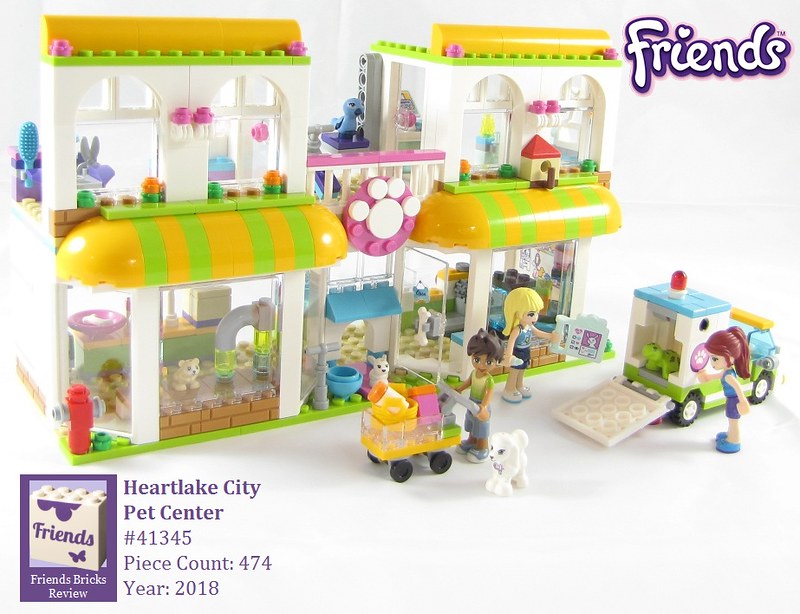
Tortoise emergency ... wait, not so fast -- that chart is for a ... Hare!
No worries, Mia will take care of the situation: because all types of animals are welcome at this colorful and lively Pet Center!
This
set was provided by the AFOL Engagement of The LEGO Group for the
purpose of sharing set details with fans.
Opinions provided here solely
reflect those of our reviewer.
Photographs are property of FriendsBricks and are not directed by TLG in any fashion.
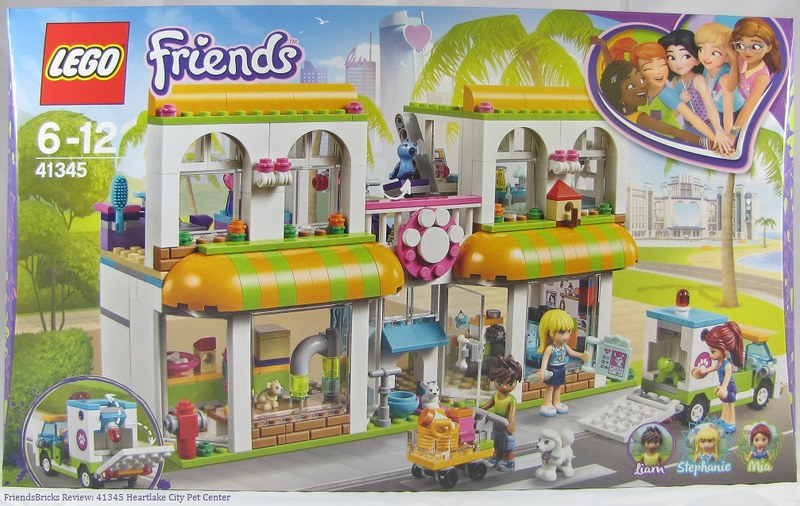
Box front: Centrally located in HLC, we can see downtown buildings behind the Pet Center, and to the right -- a view of Heartlake City Resort with its huge Heart! The heart motif with the main 5 Friends above it indicates a HLC set; not part of a sub-theme.
The insert shows the pet ambulance can serve as a van (is described as a grooming van on product page) by folding the red light inside. The purple flange art has standard Friends icons.
We get cameos of all three mini-dolls -- including a new Friend - Liam.

Box back: The insert shows us this set is a Modular design -- which means we build in sections and can swap out their placement the way we like! Awesome!
It's a very busy place (just like real-life pet centers), with various check-ups, check-outs, and active animals. After looking through all the supplies here, we place them on a moving-functions conveyor at the cash register. Just turn the red knob.
Mia, in animation form with her bright orange hair, is featured prominently in the upper right corner. After all, she's been the animal-lover in the bunch all these years.
Along the bottom appears somewhat of a new brand ribbon, although it's no longer on the front top.

Box top: LEGO Life ad + our 3 characters in a scene with animals + Liam and Stephanie with some pet supplies + Mia showing the 1:1 ratio as the main mini-doll of this set.

Box side: Brick and element collage and our 3 mini-dolls.

Box side with a "scene slice" shows us a lively scene with all the animals and mini-dolls included. I love the use of this side of the box in this way, and it helps identify sets when they're on a shelf.
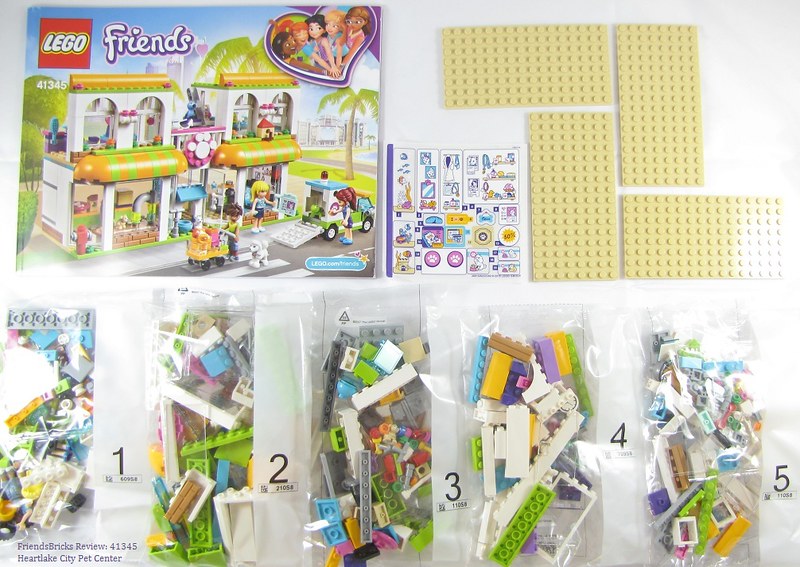
Box contents: Large instructions book (100 page), sticker sheet, four 8x16 tan plates, and five bags of parts, with inner bags.
This is a big box and I am surprised the instructions book wasn't enclosed in plastic with cardboard to protect it, as well as the sticker sheet (which got just a bit crinkled on one corner). Past sets of this size included that protection.
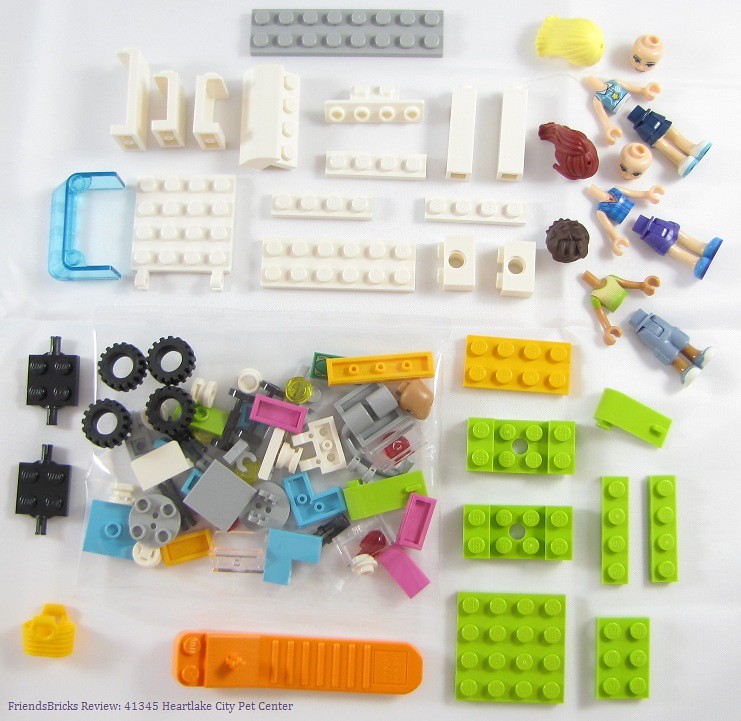
Bag 1 parts:
Rare parts: 1x2x2 Corner tiles in dark azure (inside smaller bag, near brick separator) are otherwise only in Mia's Camper Van 41339 within the Friends theme.
Left and right 1x3 doors in Lime (bright yellowish green) only in Nexo Knights 72005 Aaron's X-bow
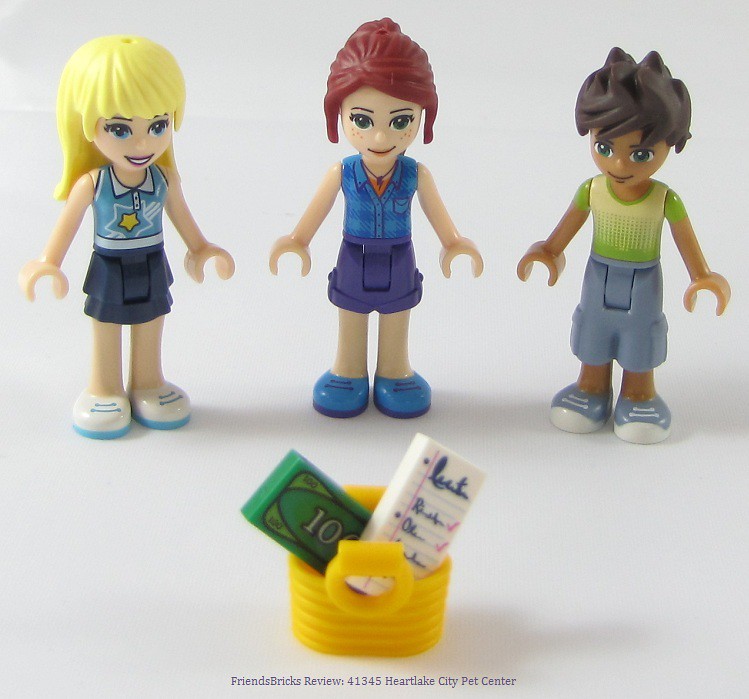
First we build: Stephanie, Mia, and Liam -- then add money and a List to the shopping basket.
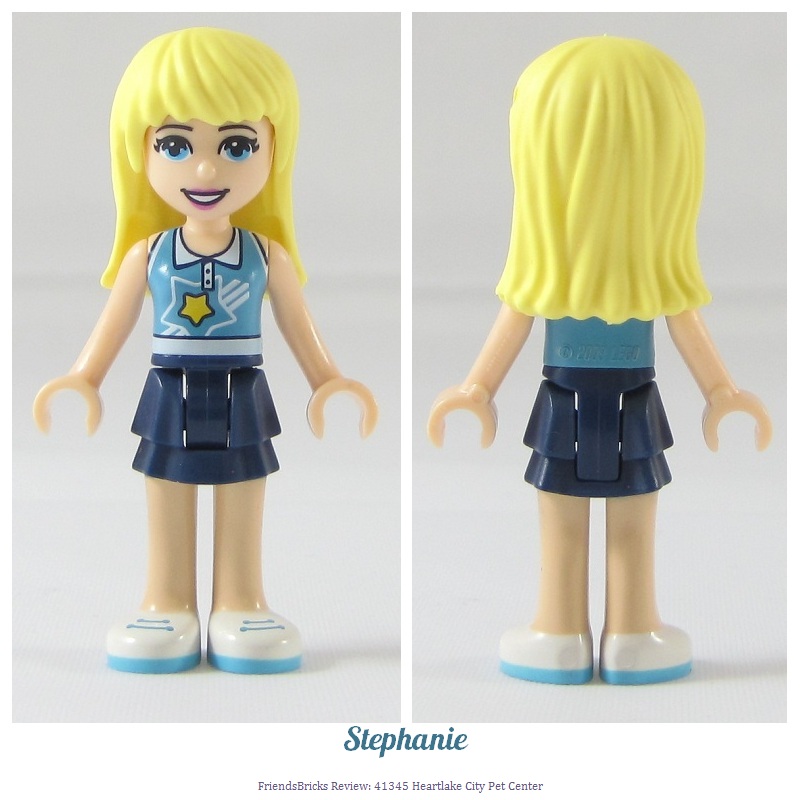
Stephanie for 2018 has a bit larger eyes and wider smile. She wears this sporty sleeveless polo shirt with her "star" icon also in the Sports Arena and her Bedroom.
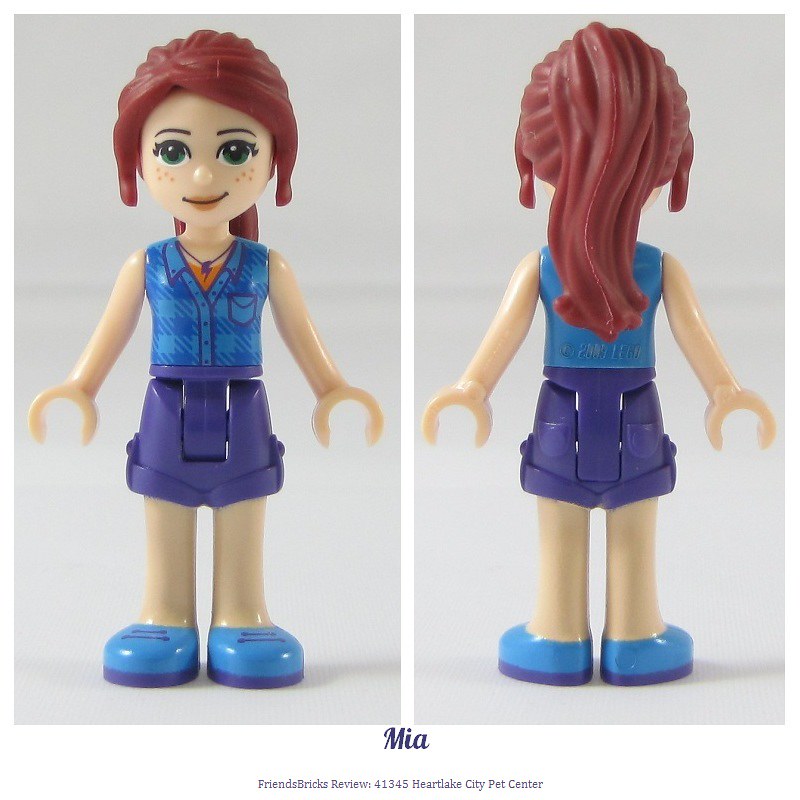
Mia for 2018 has green eyes, and a slight smirky-smile. The orange shirt under her sleeveless plaid button-up top is the color her hair should be -- IMO. The purple lightning charm on her necklace is her new for 2018 icon (used to be paw-print) and apparently indicates solar power.
She also wears this outfit in Mia's Tree House.
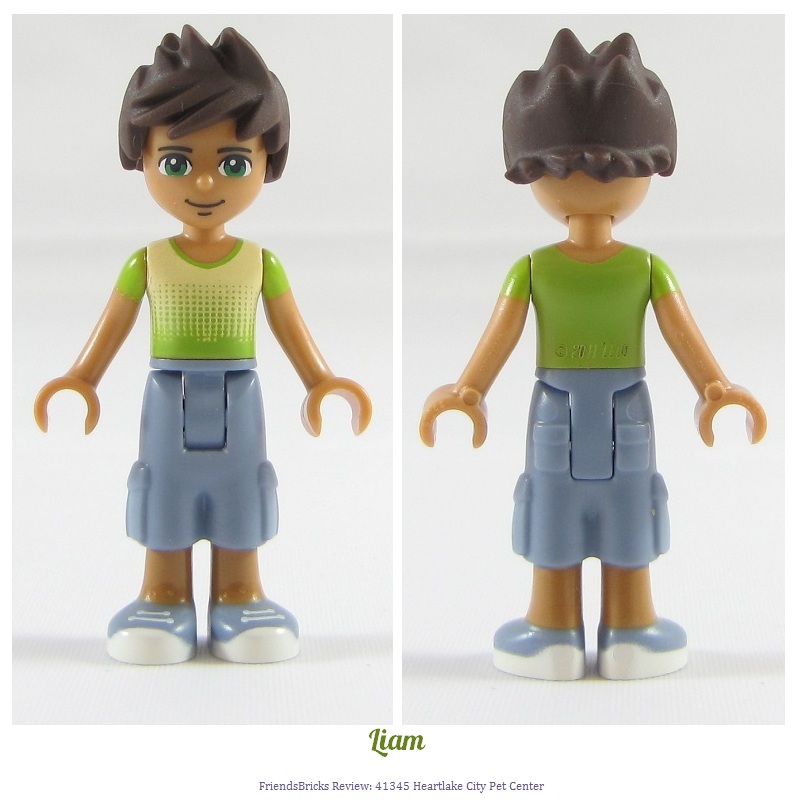
Liam has green eyes, and wears a green and tan graphic-array shirt, with faded blue jean cargo shorts and matching sneakers. He first appeared in the Sunshine Catamaran.
His hair piece is the same as NinjaGO's Kai.
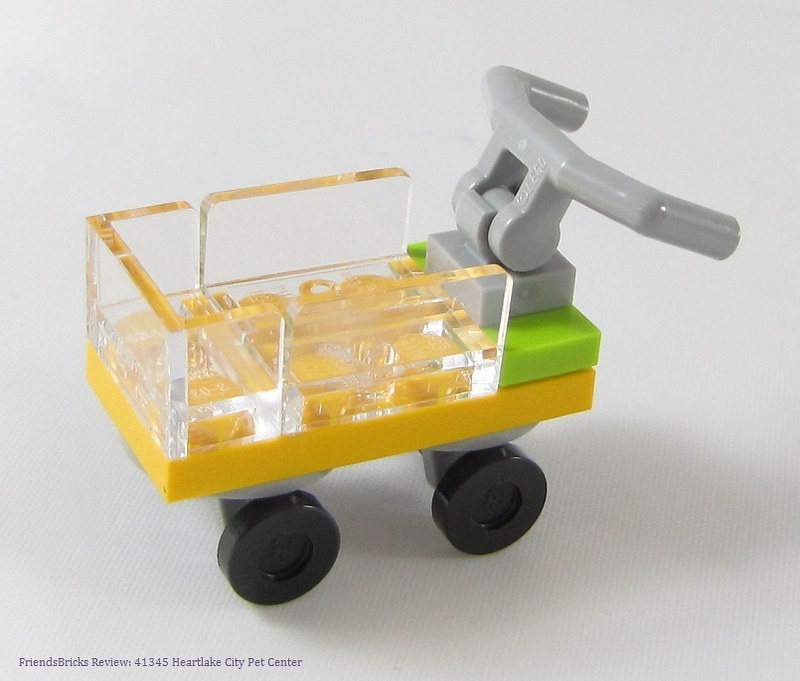
Next we build the shopping cart with clear sides.
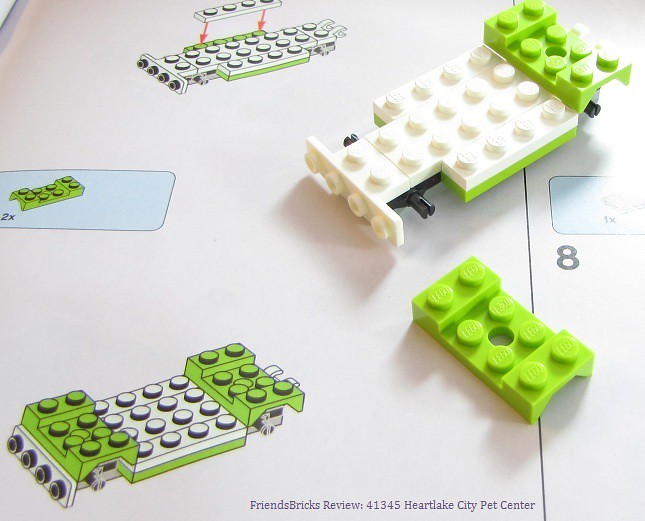
Then we begin building the ambulance van.
I think these Lime mudguard pieces and the way this base is built with double axled plates for wheels could be included in Junior sets. I think most 4-year-olds can handle this; the current chunk of base under-carriage with axle tips, layer of plates and mudguards all as one piece is too simplified.
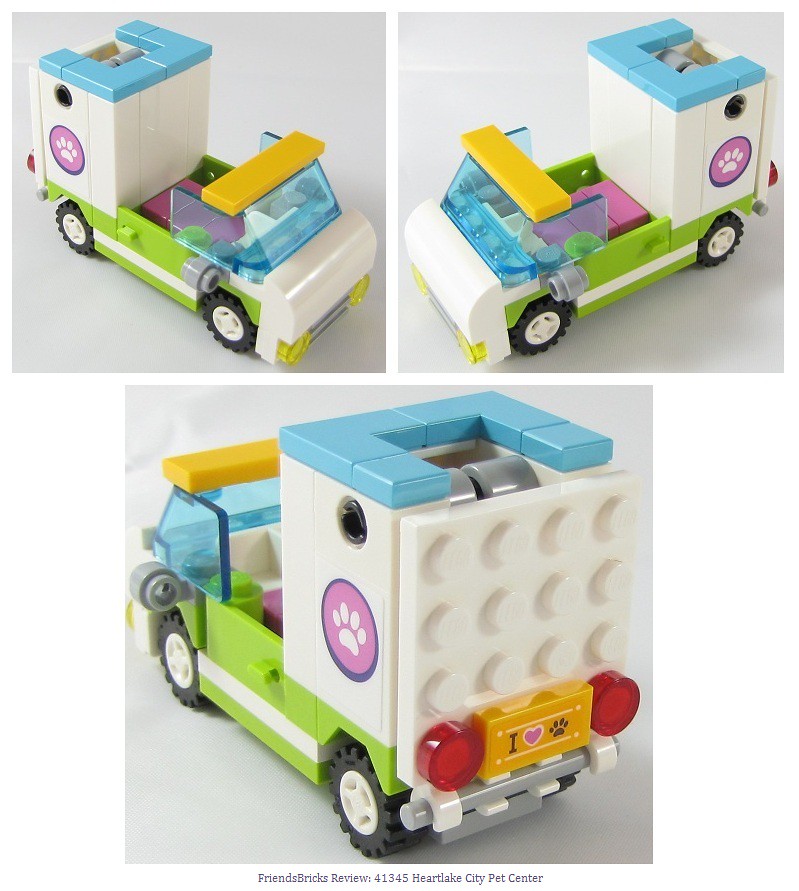
We build the ambulance van and rotate the top light down into the back so we can add the azure corner tiles and 1x1 tiles. The side paw-prints are stickers. The Lime doors open and the back opens as a ramp -- with a cute "I <3 Paw" license plate. While I would have preferred the 1x4 tile on top of the windshield to be Lime for cohesion, I understand they're using all the colors of HLC here.
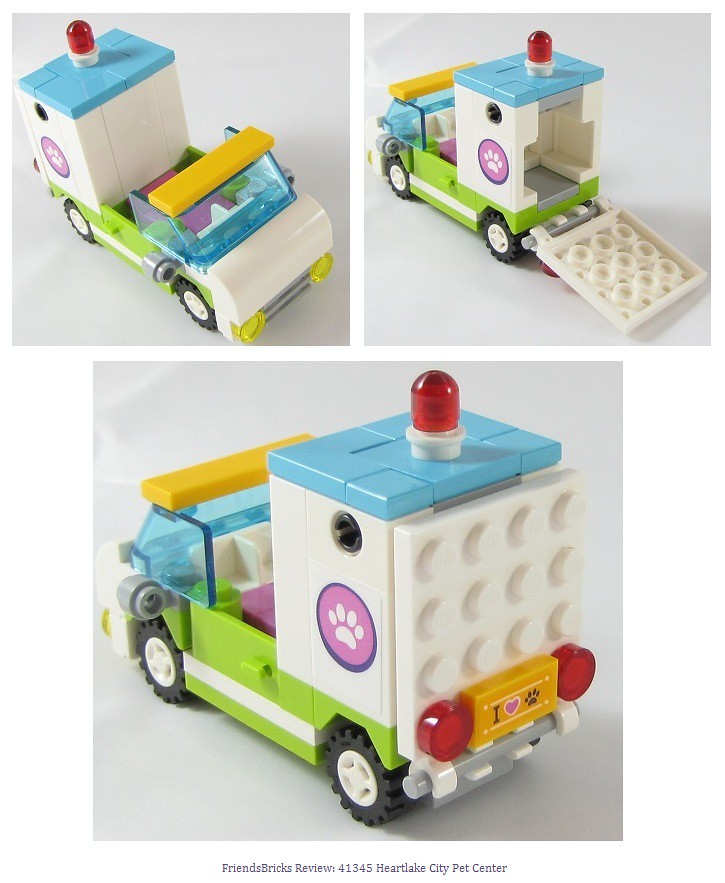
Then we rotate the light back to the top and see how much space is in the van. Make sure the red trans light element goes 'through' the hole in the 1x1 white plate and into the 2x2 azure plate's stud hole, or else you'll pull the whole thing off while rotating. To be honest, it's actually quite fun and I did make the "wee-wooo ... wee-woo" sound whilst doing so, of course.
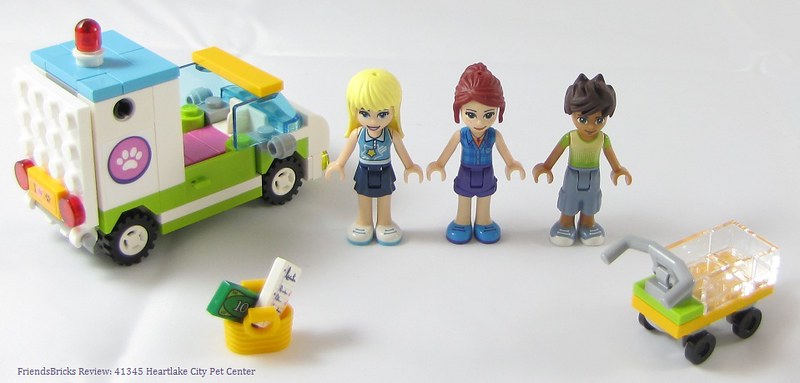
Everything bag 1 parts build!
The set description at Shop-at-Home call it a mobile grooming van ... hmm, suppose there could be a fur emergency?
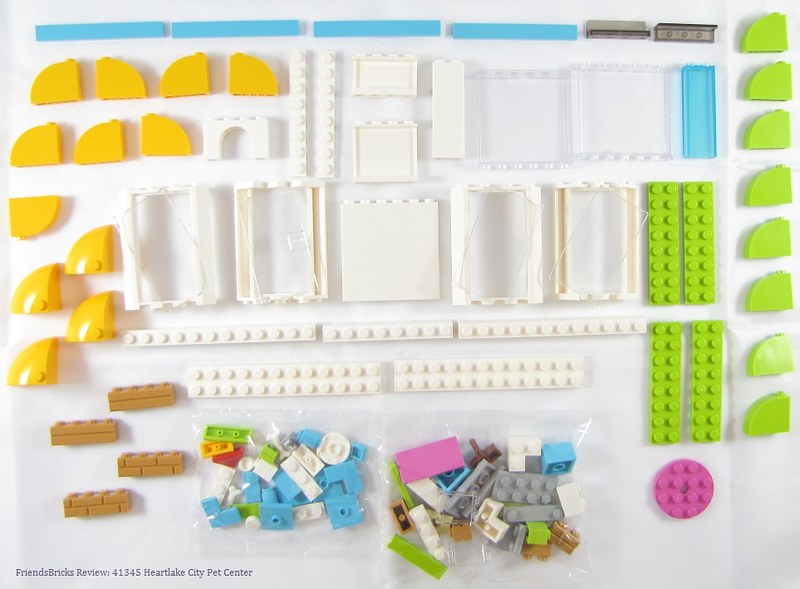
Bag 2 parts:
Rare: more dark azure corner tiles, in the smaller bag
The four 3x3x2 Arch brick in Flame Yellowish Orange are otherwise in only 2 other sets: Heartlake Summer Pool 41313 (2017) and LEGO Ideas Yellow Submarine.
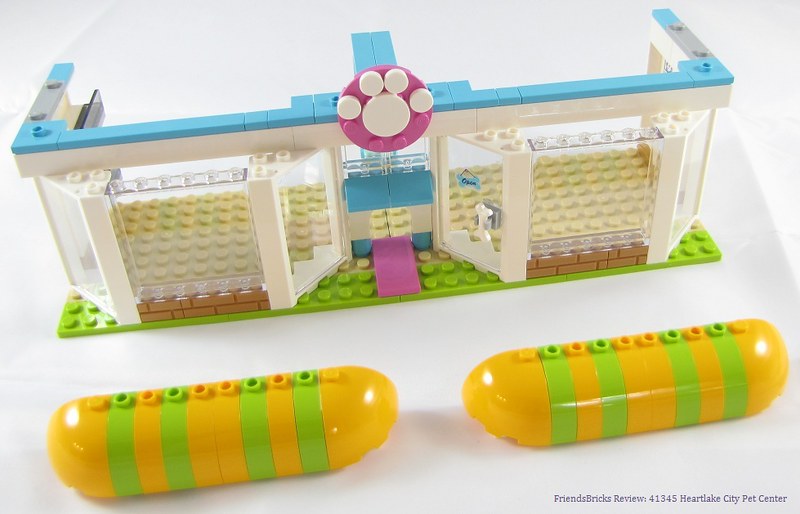
We build the bottom floor module. No real surprise steps, although several cross connections before the base is sturdy enough to move. We build the canopy sections separate.
After adding the canopies above each picture window, we top it off with the Lime tiles, and grey plates with only 2 studs -- so we can securely add the next module on top, yet remove it easily too.
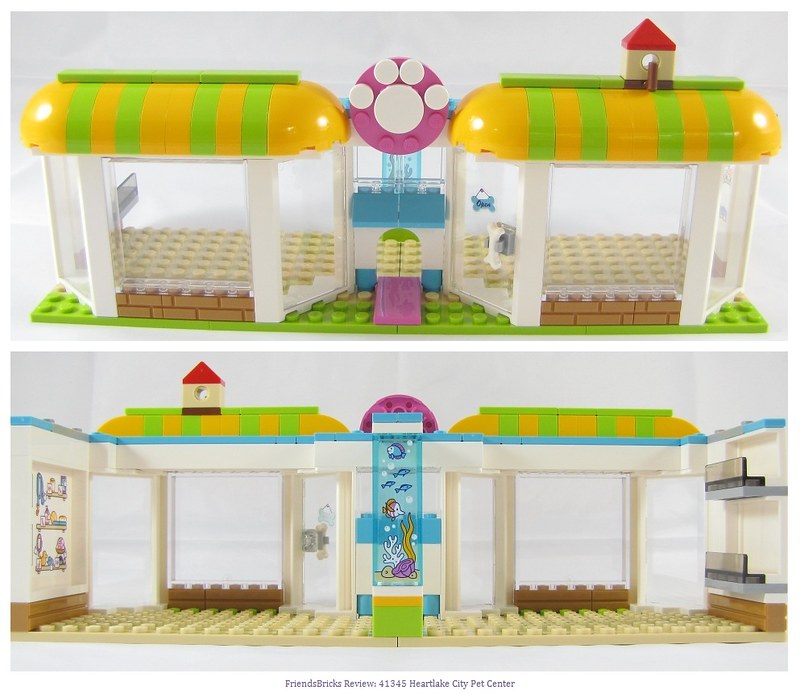
The paw-print sign is cute and fun use of those tiles. The little bird house adds the animal aspect right away!
The center is a pet door (clever) and the mini-doll door has a dog bone handle. The dark pink tile under the white arch is plain -- it's only a reflection of the aquarium you see.
Inside we can see the floor-to-ceiling aquarium, shelving on the right, and a wall with shelves (sticker) on the left.
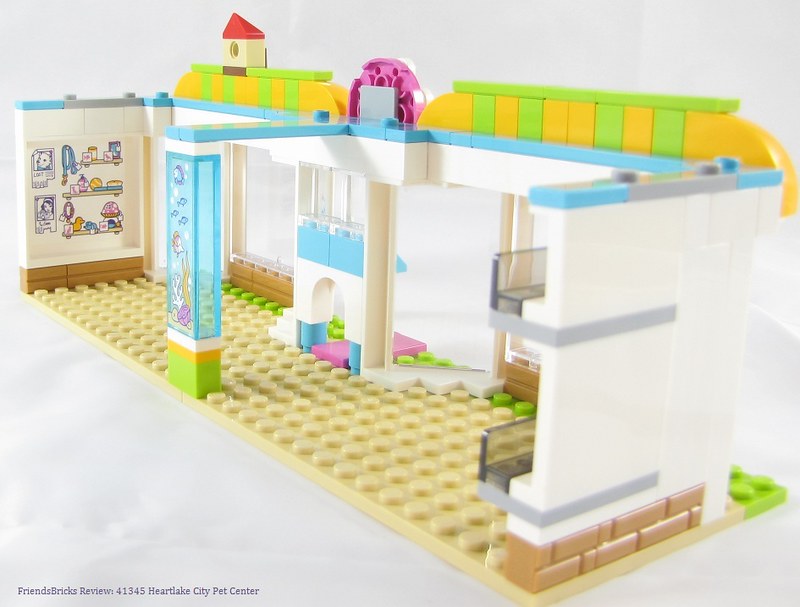
At this angle you can see the wall with sticker better; along with a Lost pet poster, there's a Mushroom House you can buy for your mouse on the bottom shelf. So, at least the stickers are cute!
That is everything bag 2 parts build.
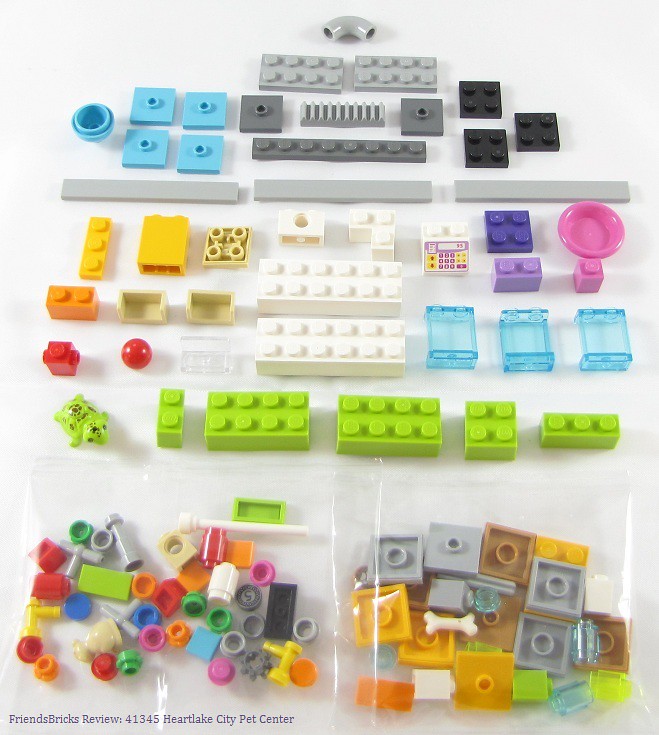
Bag 3 parts: Love that grey "elbow" macaroni piece at the top and have plans for it in a MOC.
The gear in the inner baggie bottom left plays a fun role in this set!
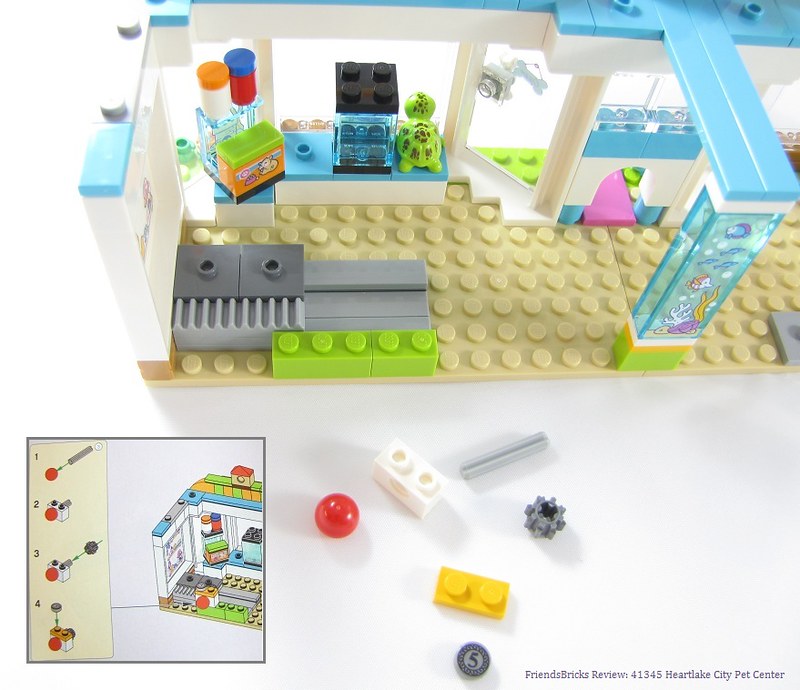
After adding several pet shop items, we build the conveyor belt for the checkout. The section with the gear teeth sits freely onto the under grey tiles. The mechanism is built as shown and connected.

Turn the red ball counter-clockwise to move the conveyor belt to the right.
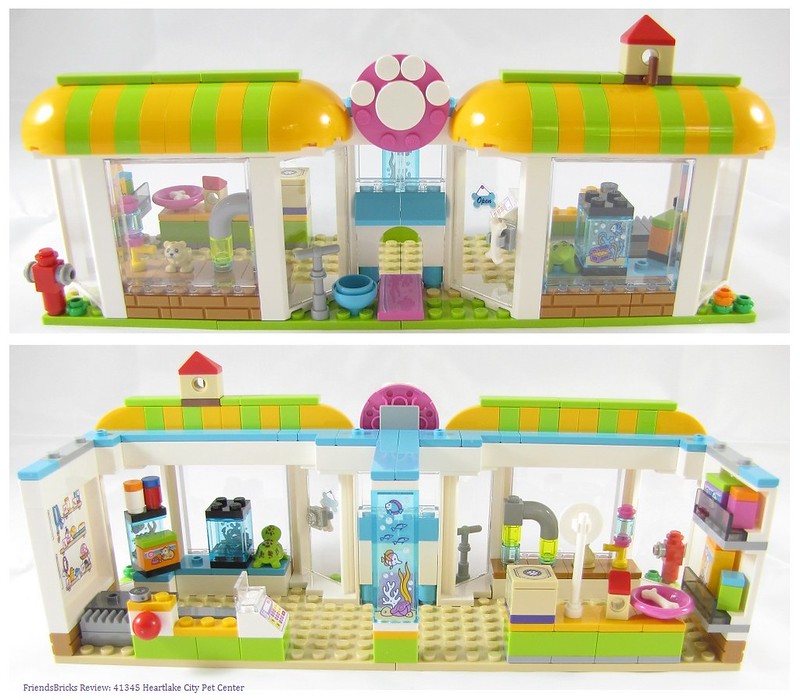
All bag 3 parts are added -- basically it's all the bottom floor's details, which is the pet supplies store area of the Pet Center.
Outside: the fire hydrant is so cute and I'm glad to have the red 1x1 with 3 knobs, and instead of just 1x1 round grey plates, we add the versions with holes on top, so we could actually connect a hose.
The use of a grey pneumatic hose connector on top of grey telescope by the front pet door works very well as a water spigot!
How much is that hamster in the window? You can see Heidi's water dispenser with yellow spigot and her tunnel habitat on her other side. Might be a tight squeeze.
Bubbles the turtle is in the other window next to a small aquarium.
Inside: we have a wide assortment of fish food, hamster food, fancy boxed biscuit treats, bird house, bowl with bone, bunny food, and poodle food.
This is everything for the bottom floor that bag 3 parts build. At this stage in building, be careful moving this section around too much -- although it's a very sturdy build, we've just added several loose elements. (Pet food boxes.)
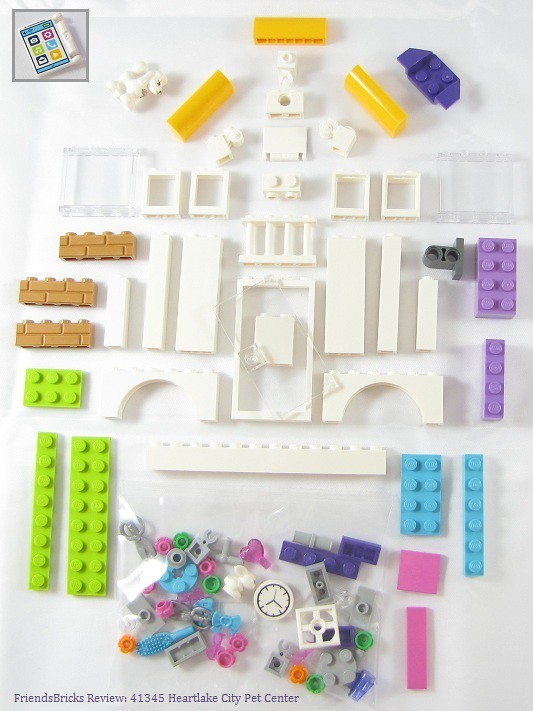
Bag 4 parts:
The printed piece inserted in the upper left corner accidentally got laid white-side-up for the spread. It's a device screen and not too rare, having been in several Friends sets already.
New color of Flame Yellowish Orange for those three 1x4x1 1/3 (slope) bricks.
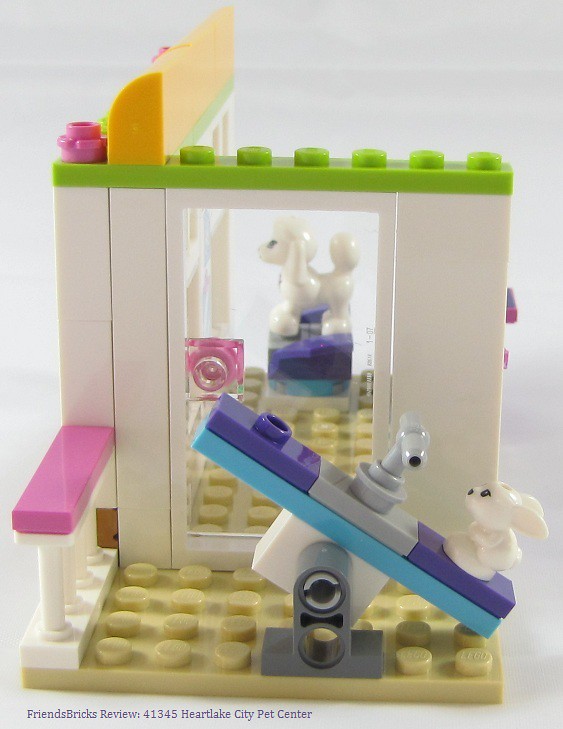
First we build the see-saw using a Technic t-beam and Mini is happy!
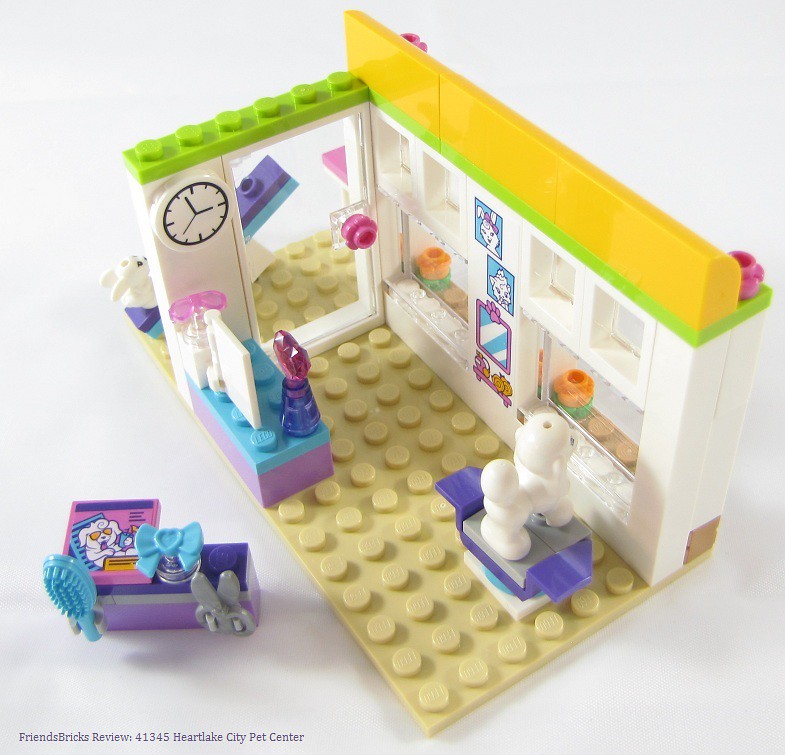
After installing a rotating styling chair for Lady and a counter with perfume and sun glasses (and the printed media device piece clipped on), we build the second counter separately before installing. It has a cute pet grooming magazine sticker on a dark pink tile.
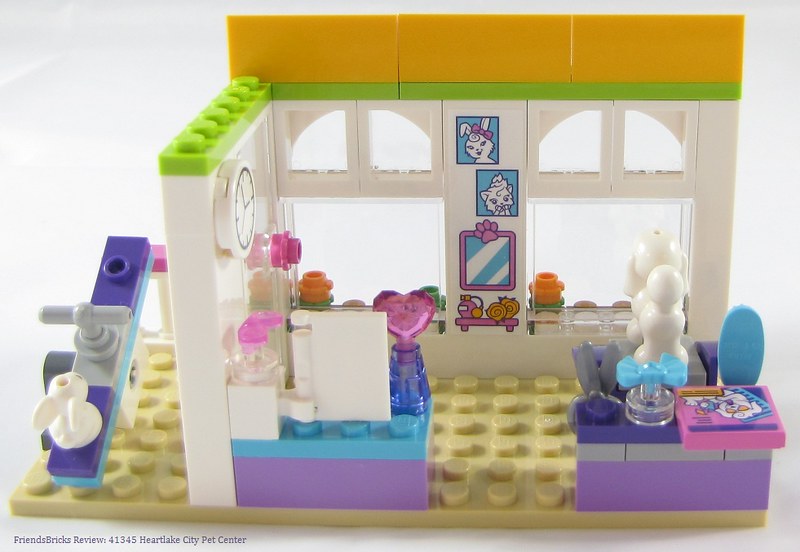
Now that counter is installed so the brush and scissors are near the styling chair.
This grooming module is finished. All parts have been added that came in bag 4.
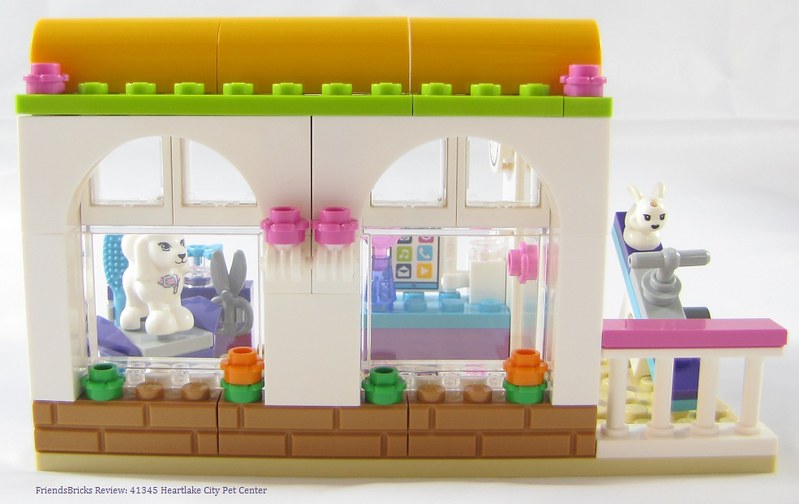
An exterior view of the upper grooming module; dark pink flowers on the profile bricks accentuate the archway windows. Nougat "brick-bricks" make nice flower boxes. Luckily railing is a safety feature for the see-saw.
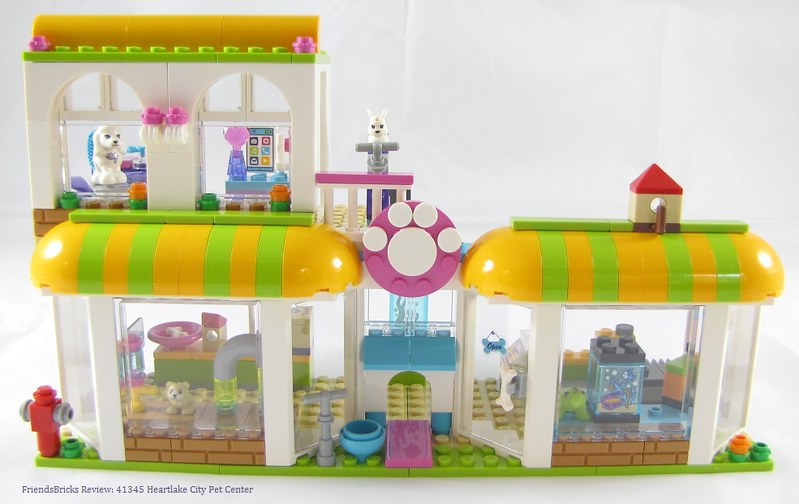
Now we connect the upper grooming module to the bottom pet shop module -- exterior view.
The connection is held by the 2-studded 1x4 grey tiles, while the unit rests on the azure tiles for easy left off.
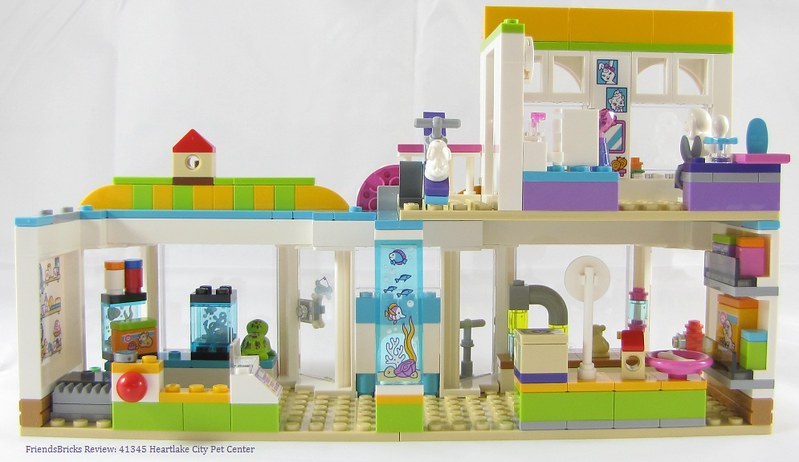
The interior view shows the beginning of a busy pet center!
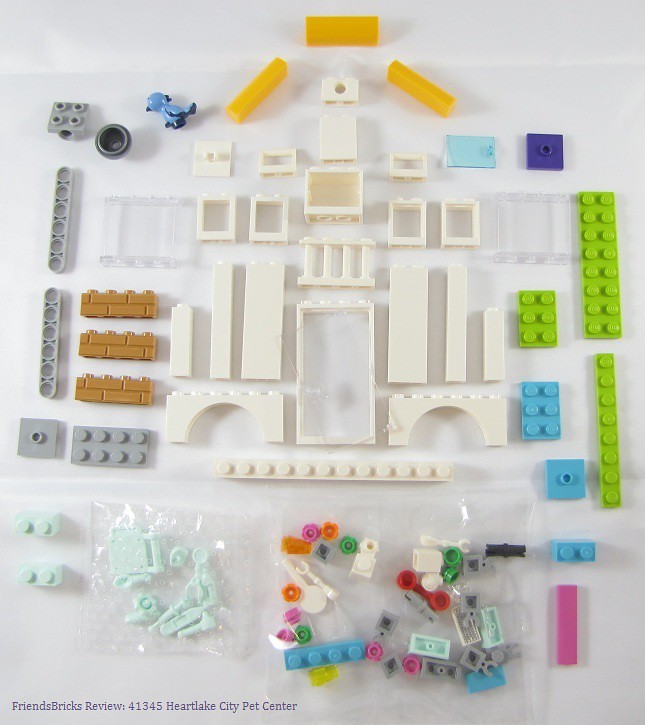
Bag 5 parts: Quite identical to bag 4, of course.
Three more 1x4x1 1/3 (slope) bricks in a new color - Flame Yellowish Orange.
Printed computer keyboard tile in small bag bottom right.
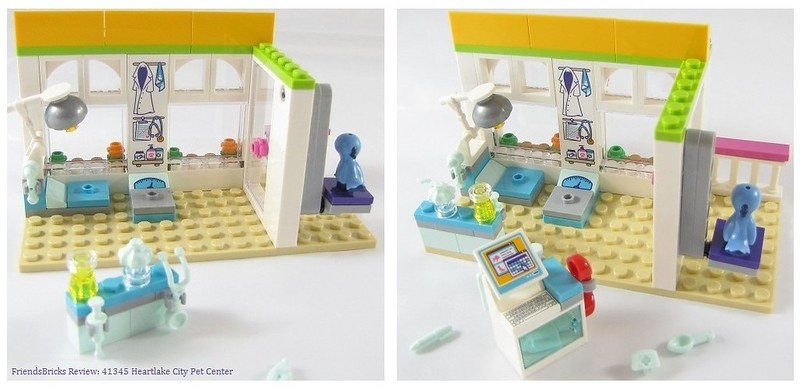
First we use the Technic beams to build a swing for Mimi, add the door, exam table with light, and weight scales.
Then we build the first medical counter with Aqua instruments separate before installing it onto the module. We build the cabinet by adding the trans blue door; at this point the instructions say to put all the rest of the aqua instruments, except for the Pen, inside. I added the Thermometer and Bottle, yet kept out the medical staff cap and spoon -- for using in scenes.
Make sure to place the computer monitor sticker the correct direction so the piece will clip to the holder above the keyboard tile in the proper orientation.
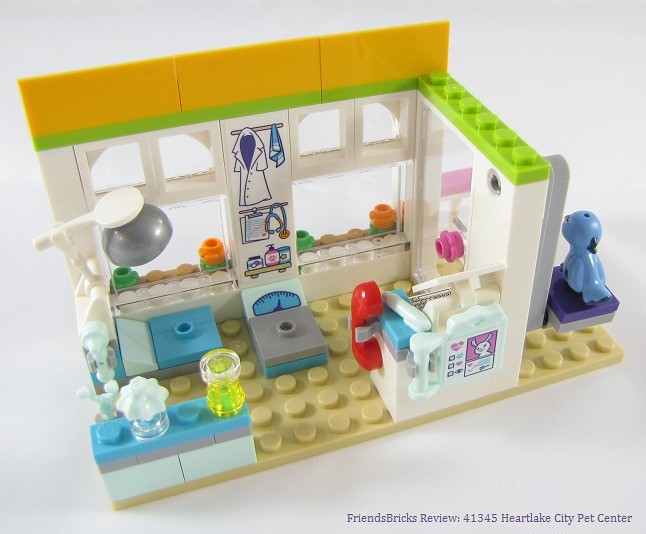
Once we've installed the cabinet with computer and phone, you can see the medical chart gets attached to the back. We are instructed to place the Pen onto the azure tile. I did so, for this photograph, yet quickly removed it to a secure location before moving this Vet Clinic module around for attaching to the rest of the center's building.
Not sure about the trans yellow bottle ...
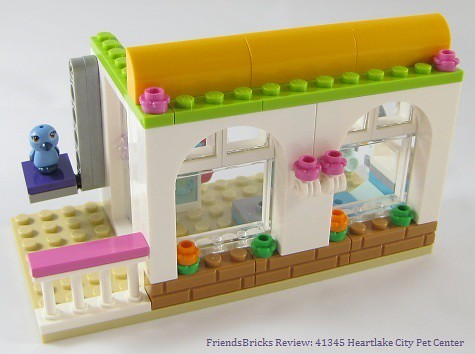
A view of the exterior of the Vet Clinic module. Mimi looks content; her swing articulates at both Technic pin point when rotating, so she can remain beak-up!
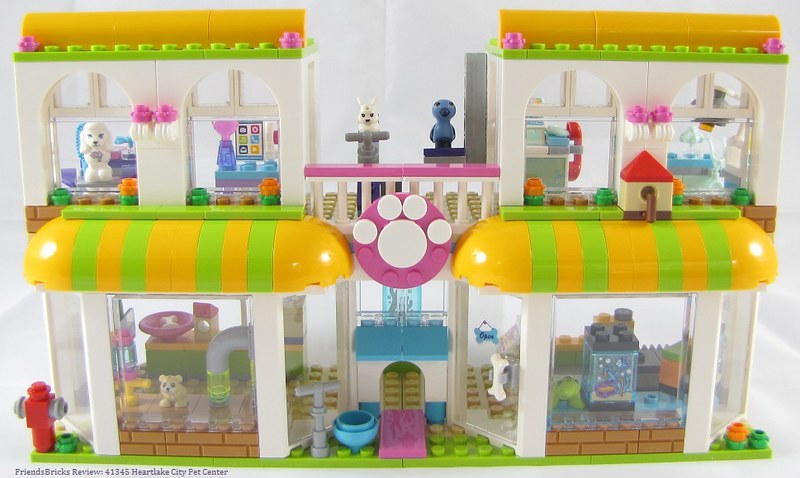
Complete Pet Center exterior.
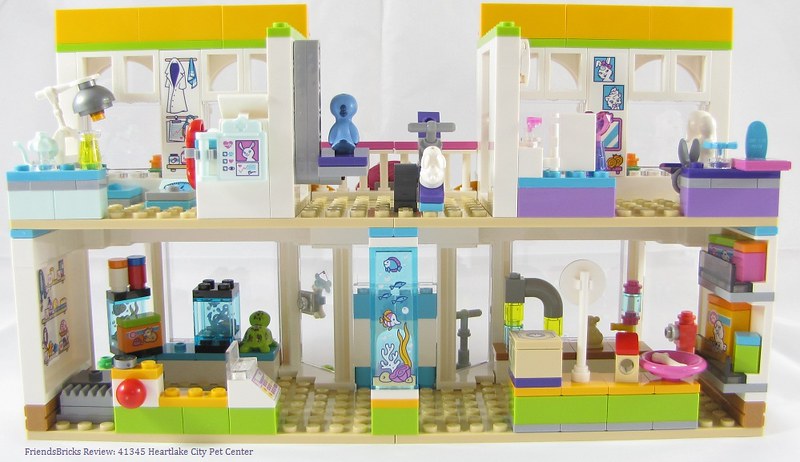
Complete Pet Center interior.
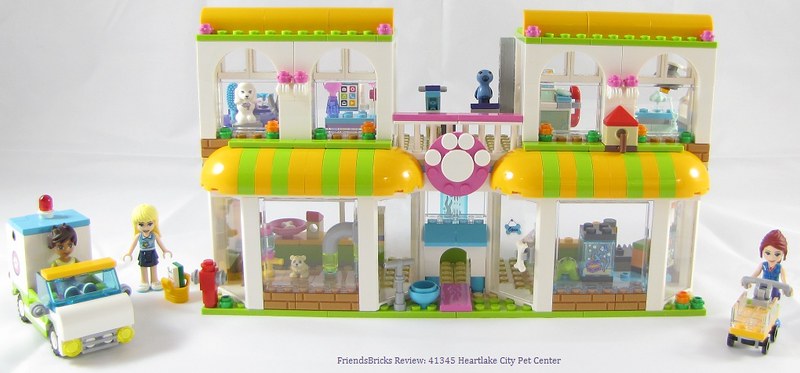
The complete set build -- everything the parts in this box builds -- arranged per instructions.
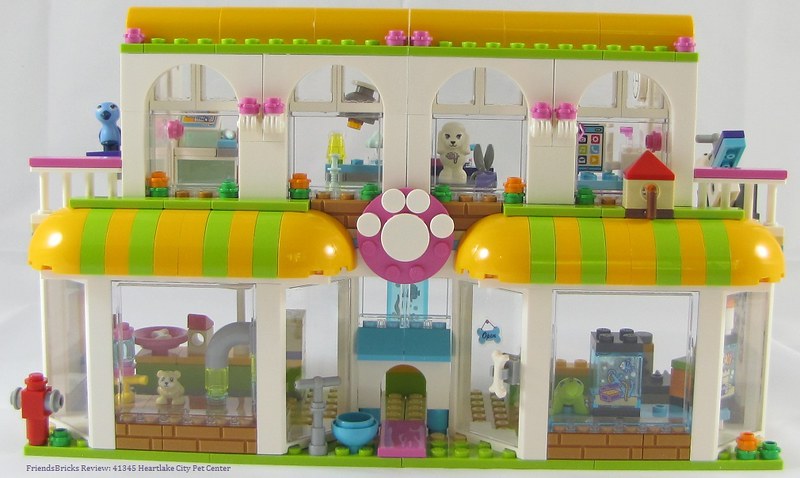
Here is what it looks like with the upper modules swapped places. It helps the paw print sign stand out a bit better.
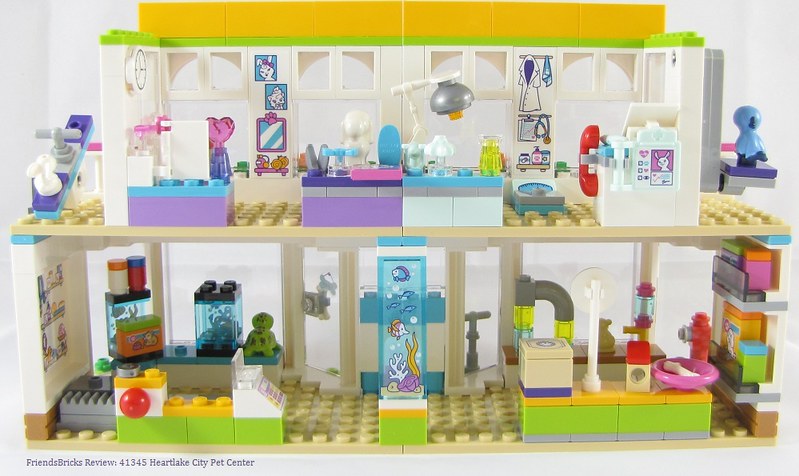
When the upper modules swap places, it does separate the animal play area. Although there is still front railing, little bunny could fall off the side!
This also removes the separation of the grooming salon and the medical clinic. Yet, I kind of like it enclosed this way. Maybe sick pets seeing other pets getting pampered would brighten their spirits.
Play-ability:
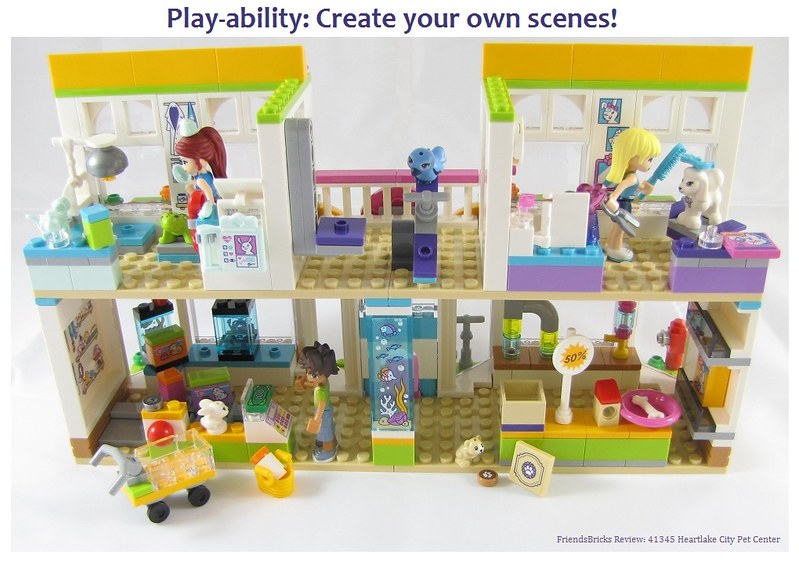
Mia treats Bubbles with turtle food supplement, and Stephanie grooms Lady with an azure bow ... meanwhile below in the shop, Liam buys food for Mini the bunny, as Mimi eyes that shiny shopping cart from the see-saw.
Such a busy day, nobody realized Heidi got into the biscuits!
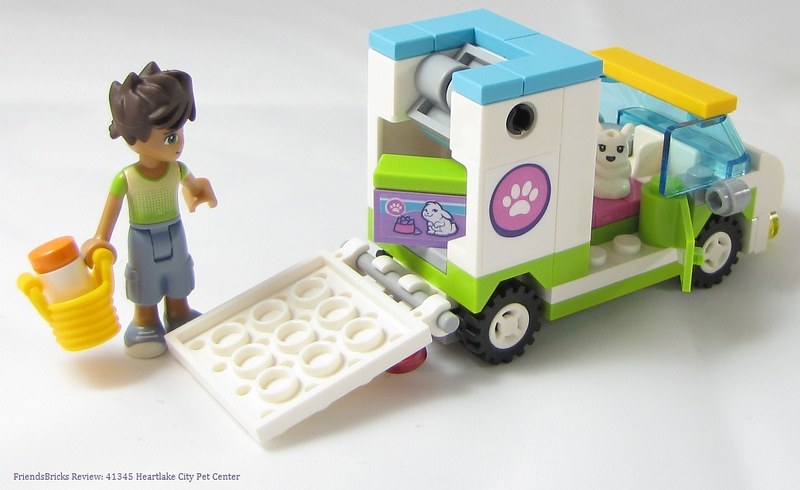
With the red light stowed inside the van, to use the ambulance for deliveries, Liam tries to fit all of Mini's food!
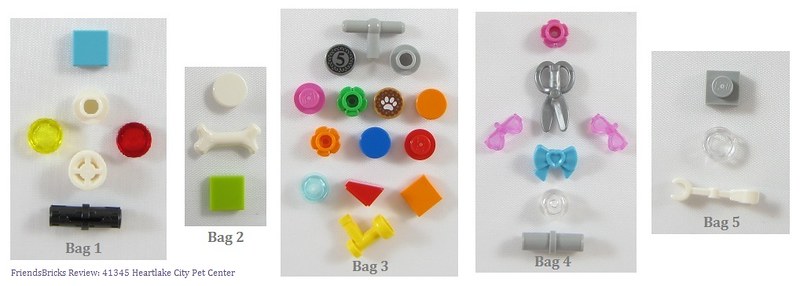
Spare parts from all bags.
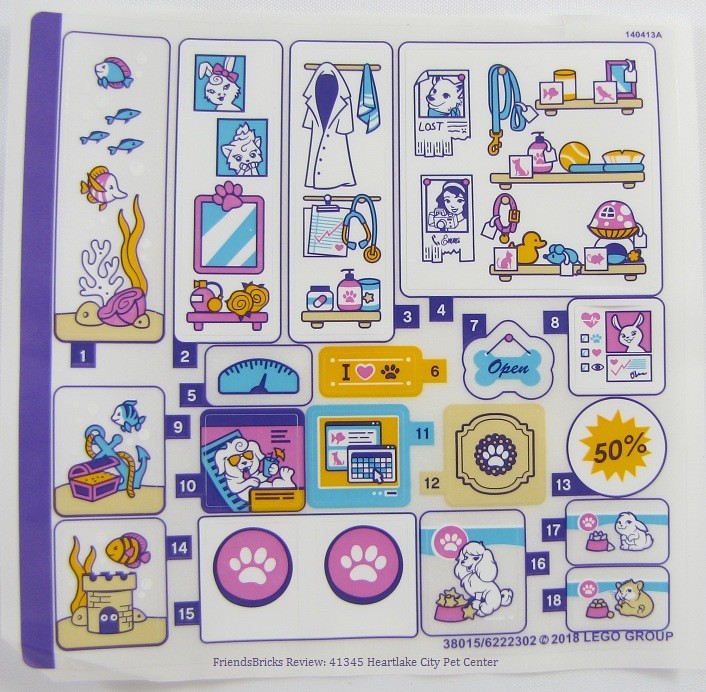
Eighteen stickers for Heartlake City Pet Center.
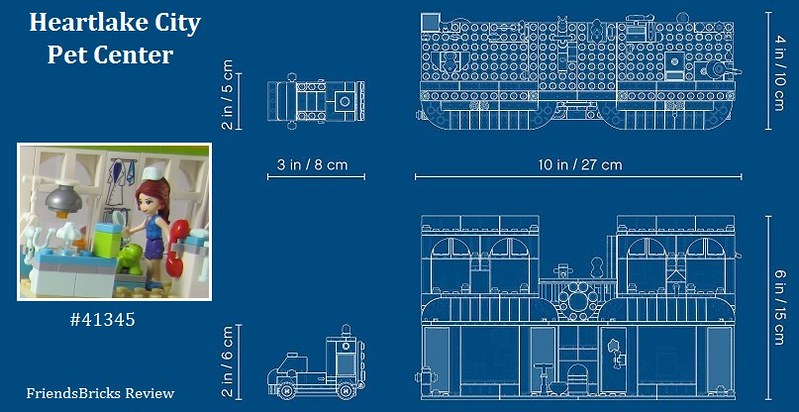
Blueprints of 41345, with a snapshot of Mia treating Bubbles with turtle food supplement.
My Modular Modification/ReBuild: Liam's Loft
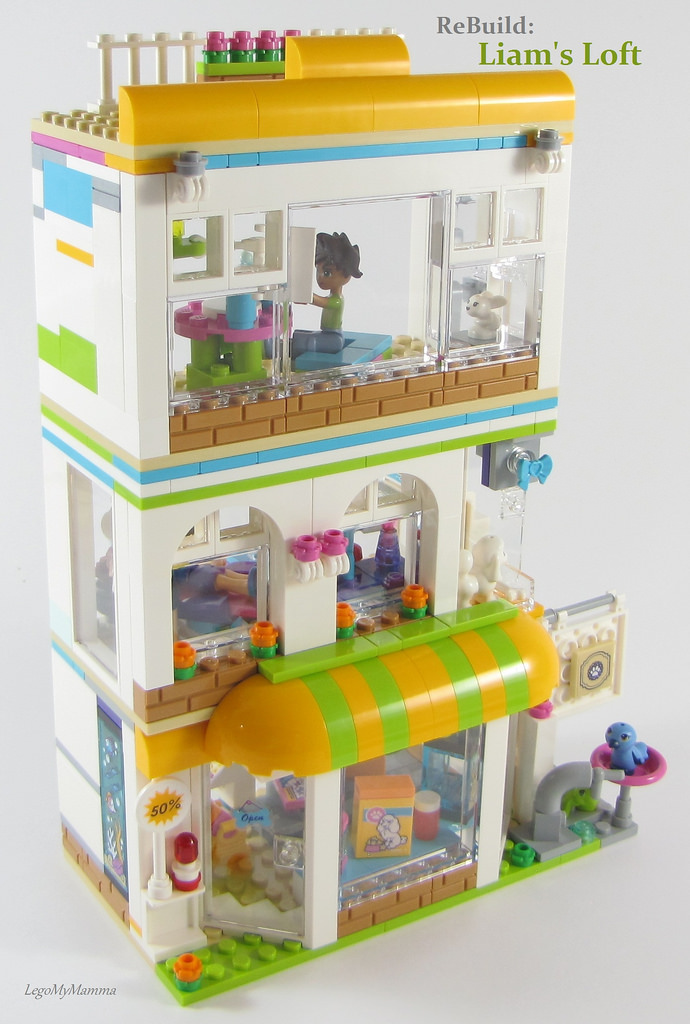
Liam's Loft
Built using only pieces from this set: Liam decided to open a pet supply store below his Loft apartment in a building downtown. Stephanie asked if she could open a hair salon in the second floor space.
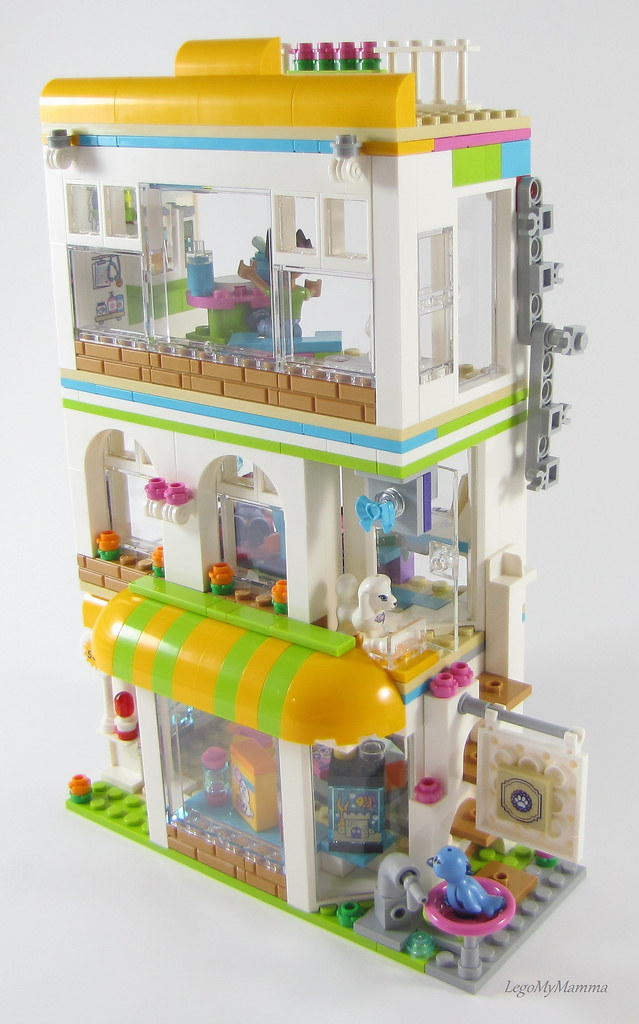
Mimi loves the birdbath and Lady likes to greet all the people coming to the salon for a new hairdo. Liam is about to have Lunch in his Loft.
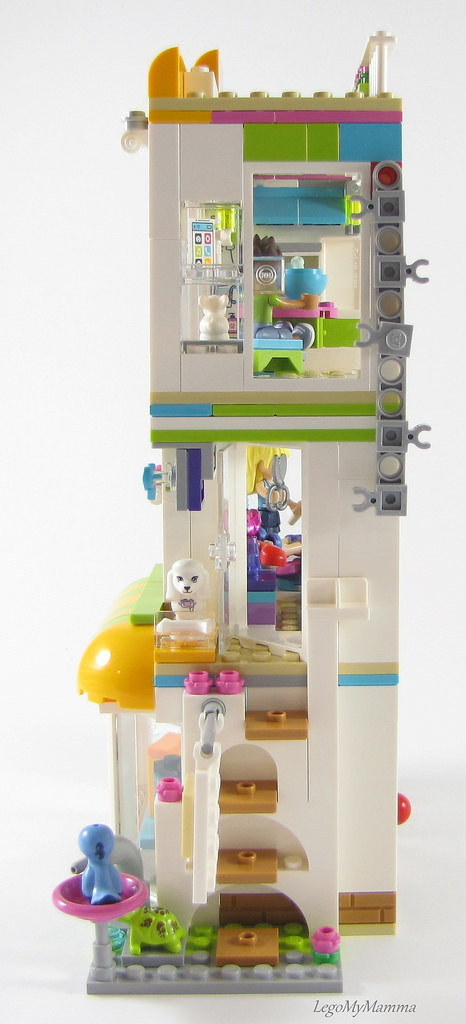
Looks like Bubbles the turtle found the water spigot too. The stairs lead to Stephanie's Salon, and then Liam climbs the fire-escape Ladder to his Loft, which ensures privacy. He can also climb to the roof to check on his Flowerbox.
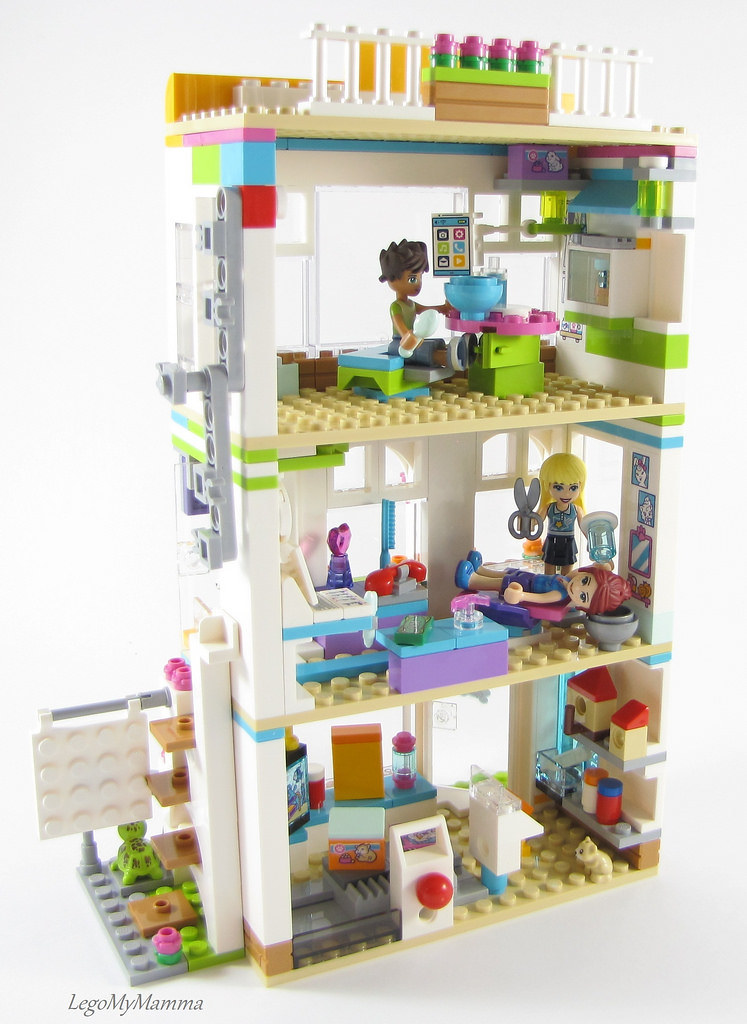
Liam can mount his tablet and check his message during Lunch. Soup for him today!
Stephanie is washing Mia's hair before giving her a trim: "Hey, Mia, are you sure you don't want me to dye your hair 'bright orange' to match your new graphic version? It looks good on Batgirl," says Stephanie, with a smile.
Heidi is after the Hamster food in the store -- be careful on that conveyor!
A thermometer gets inserted into the full-length Window Aquarium by the front door -- to make sure the temperature stays just right!
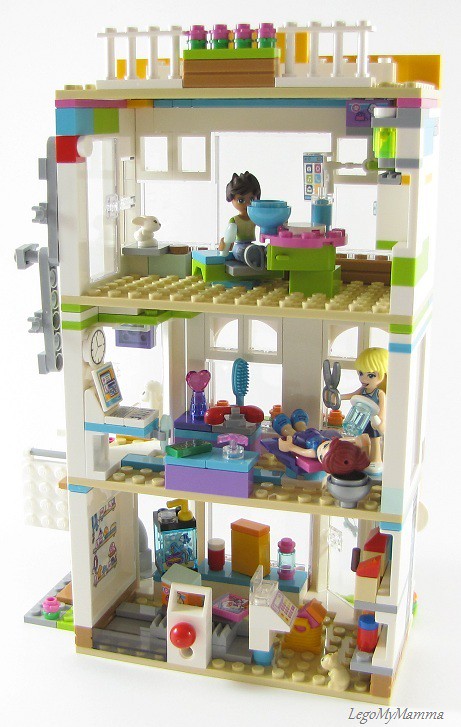
Mini has a biscuit, but is eyeing the box of Bunny food on that high shelf ...
The Salon has a computer and phone for making appointments.
The small Aquarium for sale in the window has a water spout system to keep it fresh.
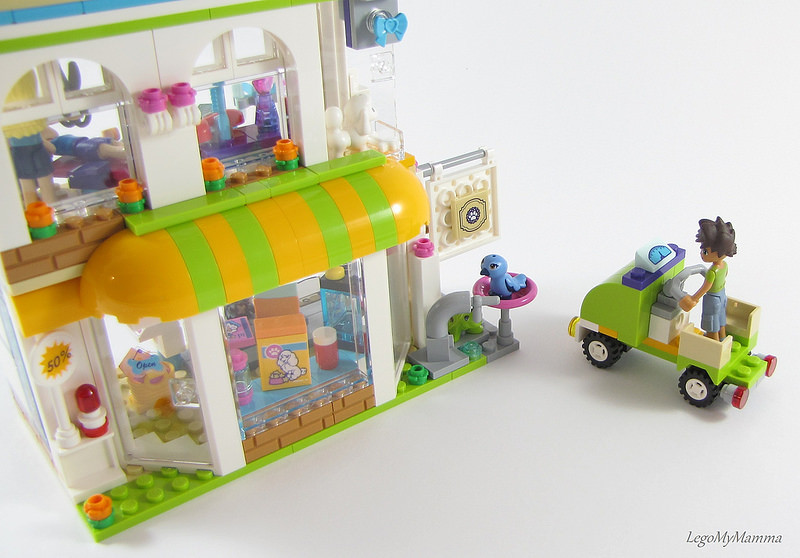
Red light specials! Liam's Pet Supplies Store has a sale going on today! He's going out on his Pet Patrol duties; he decided to help out the neighborhood and look for hungry animals.
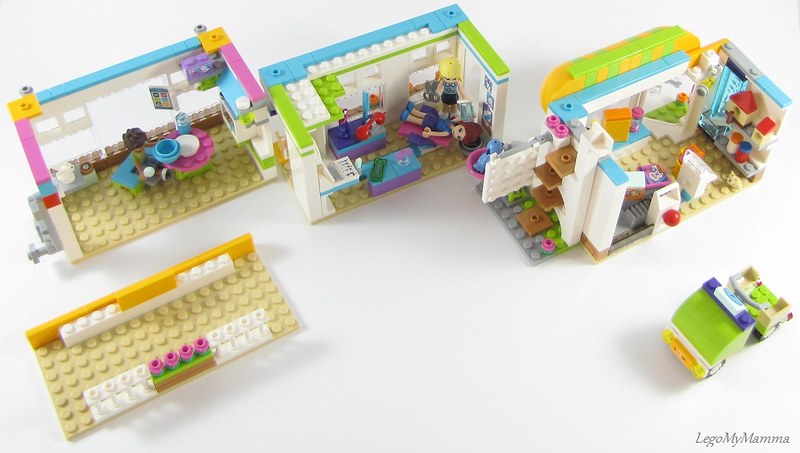
Liam's Loft - all the modules - and his patrol cart (electric, of course).
Summary:
The brightness of this set is like sunshine burst onto your building table! It would look good on a street near the Heartlake Supermarket. I respect that they wanted to use all the colors in Heartlake City because this is a "central" location. Real-life Vet clinics often have soothing colors in their decor -- probably for the owners rather than the pets. It's stressful taking a pet to a clinic. Pets need a cheerful vibe. This place has it.
Modular buildings are common in the Friends theme; this one is more symmetrical than past ones. Swapping modules is a quick way to change this set; you could easily clear out the interior and create a build-out for a restaurant, or other shop. It just happens that the upper modules echo the arched design of Andrea's Accessories Store. The front paw sign would be fun to re-design into a cafe's or some other type of store.
Even though much attention has been paid to all the detailed parts, it's still function-able and set up like a real pet center.
The ambulance van is a cute, small build that reminds us of past simpler vehicles -- like the 80s LEGO Mail Vans.
Certainly, out of the 474 parts, any builder can find their favorites and use this set as inspiration for a fun ReBuild.
Brickset was used to verify new parts

4 comments:
This one is definitely going on my wish list! Love it and all the little animals.
~Xyra
Great review and I love your alternate build with Liam's loft!!
I love this Lego set! Is this set better than the other veterinary clinics?
Good set, but the colorsheme is attroucious.
Post a Comment
Note: Only a member of this blog may post a comment.