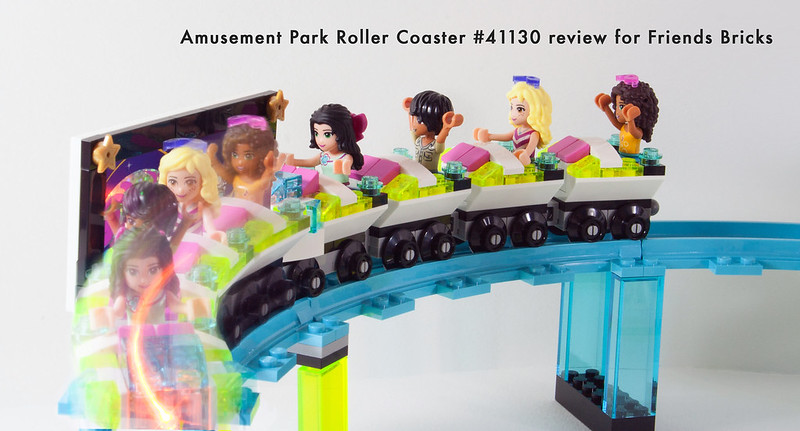
Ladies and gentlemen, children big and small, please join me for an
afternoon of fun in the new spacey blue roller coaster and the park's
other attractions!
This set was provided by the AFOL Relations & Programs team (AR&P) of The LEGO Group for the purpose of sharing set details with fans.
Opinions provided here solely reflect those of our reviewer.
Photographs are property of Friends Bricks and are not directed by TLG in any fashion.
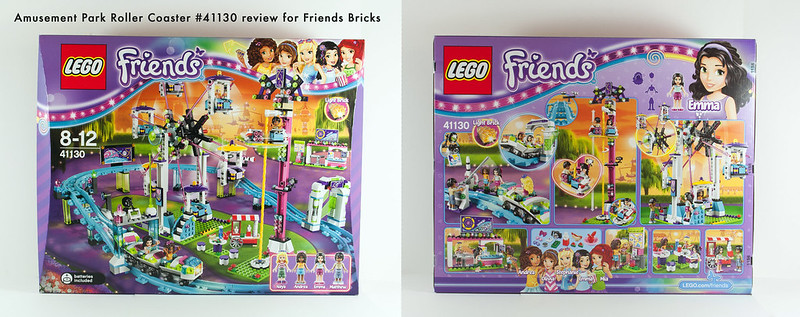
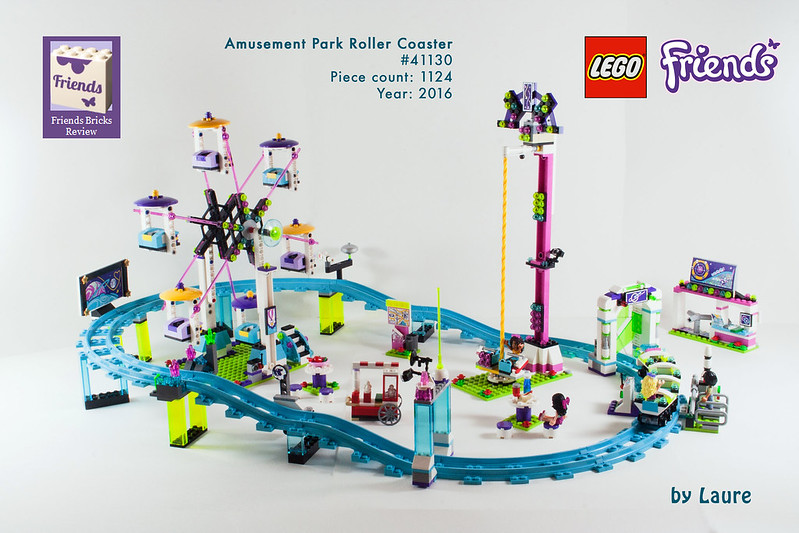
Wow! Not that I didn't know it already before, but this is a big set. I believe it is the main attraction at the amusement park this summer. I will do my best in showing you all it has to offer, but as you can see from the box, there is a lot going on!!

Let's open up the box and find no less than eight numbered bags plus two other bags! The instructions are also in a bag and there are two swirly yellow bars as well. Somehow I have a feeling there will be a lot of technic pins! Notice how bags numbered 7 and 8 are the old fashioned ones. Well, they are not that old, but I guess TLG must still have some unused leftovers in their factory stock.
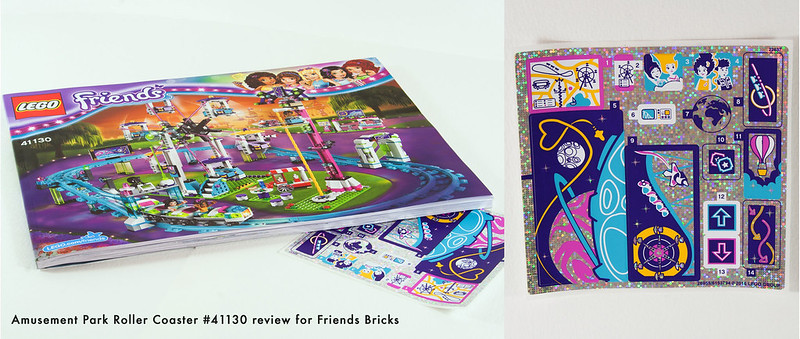
For once, and surprisingly for such a set, there is only one booklet, a nice sturdy heavy one. And as good as new since it was protected by the plastic bag along with a single sheet of stickers.
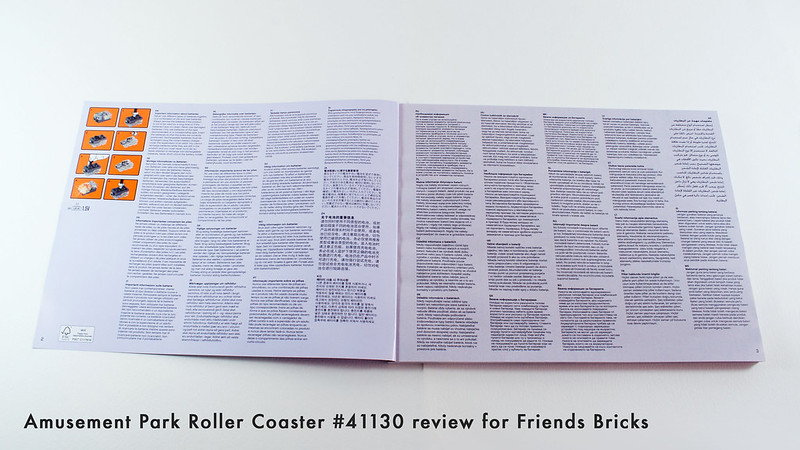
I am usually not the one to check the booklets in details to look at ads and all. But I was pleasantly surprised to find an electronical device warning, those are not too common in the Friends theme. You can see what it's about in the top left corner, but we will go over that later on.
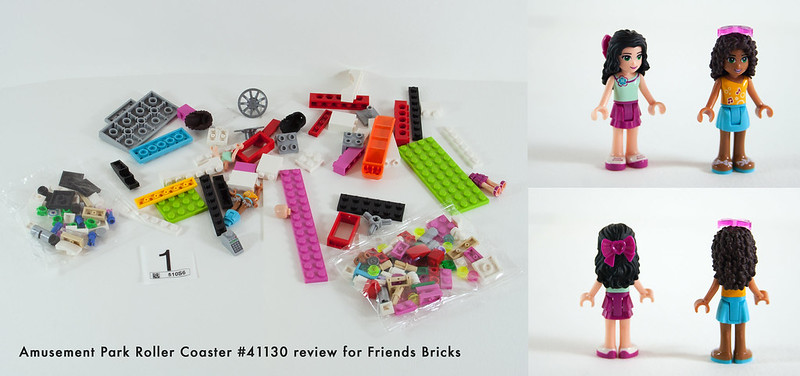
Here is the first bag with it's inner bags. There is one brick separator. We start with two minidolls, Andrea and Emma.
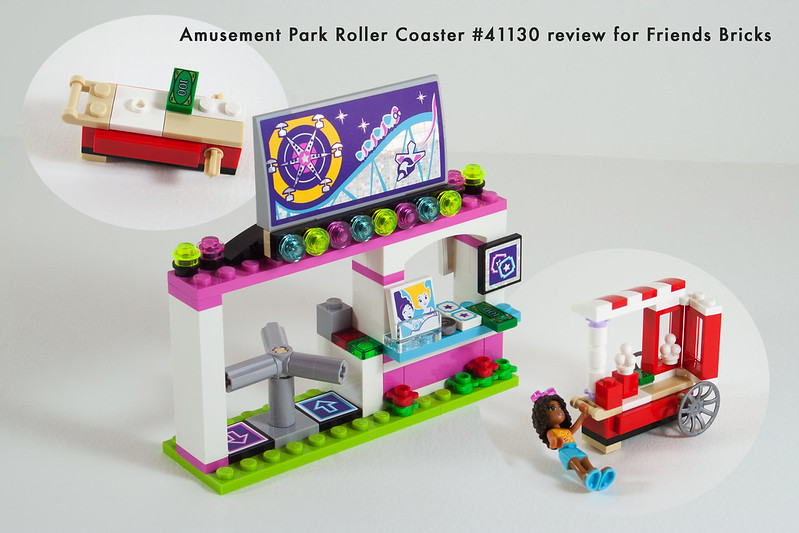
Top left is what we start building at the very beginning. Funny how we start right away with dinero (that's money!). Fear not, there will be plenty to eat, but first, you must walk through the main entrance and pay for those adorable park tickets, the two 1x1 printed tiles. I love how the window on the Popcorn cart opens up and those white hinges are not too common. I'm already thinking this so cute!!! Let's continue on... I still find a shame that minidolls' hands don't turn and I had difficulty positionning Andrea...
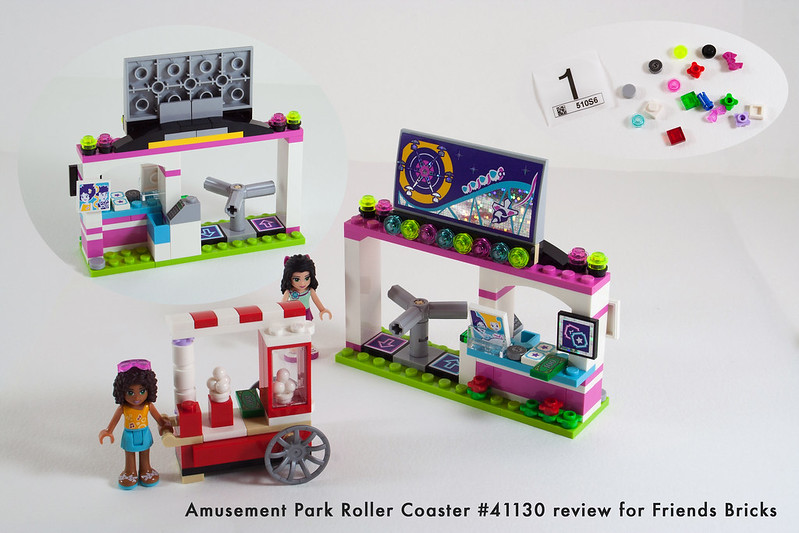
But I managed to figure it out! Here is all of bag 1 completed along with spare parts. That's a lot of spare parts, don't you think? So far, I think the amount of detail is pretty incredible. I want to take a picture of every aspect, but I know there will be a lot, I might have to skip one or two.
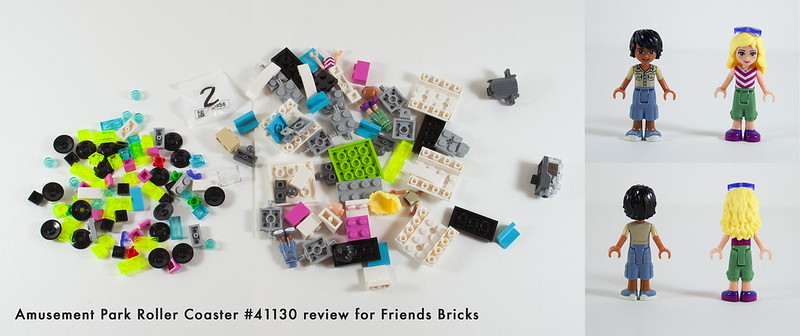
Let's move on to bag number 2, it's getting technical, I see some good old Mixel joints! We start with two more figurines, new friends Naya and Matthew.
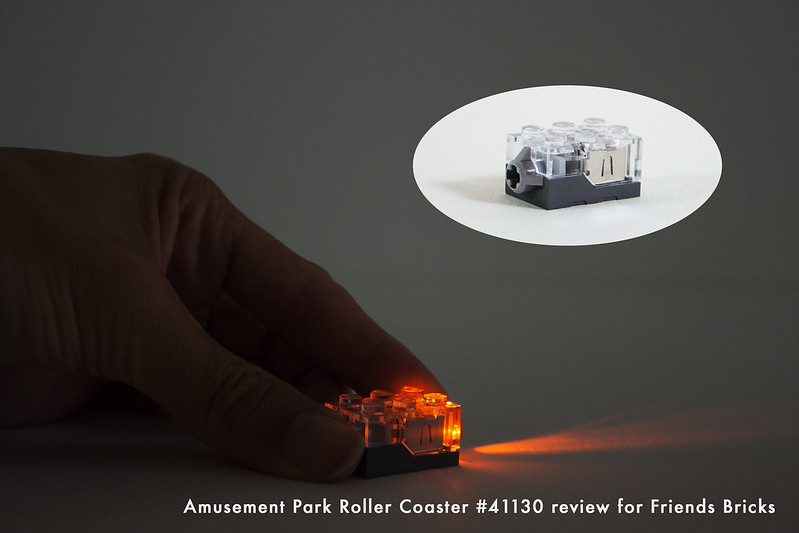
We can finally take a look at the 2x3 light brick. This is what all the electrical fuss was about. Do not throw away with regular trash. I'm not planning on doing that.
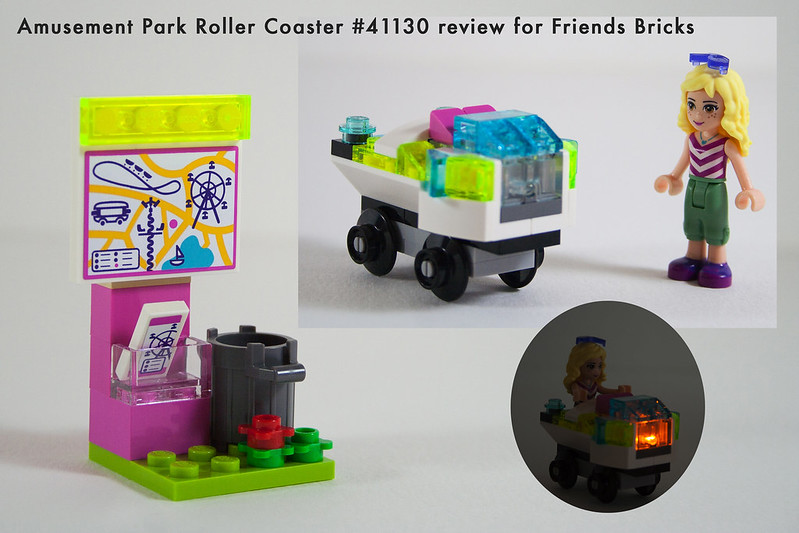
Speaking of trash, we first build a cute little stand with park map, a brochure, and... guess what, a trash can! We then use the light brick to build what looks like a cart for the main attraction, the roller coaster. You kind of have to force figurines in place, but see how Naya lights up the brick when seated. I like the fact that for once, minidolls stay seated in place without the use of the usual 1x2 panel with center divider, that we always find in cars.
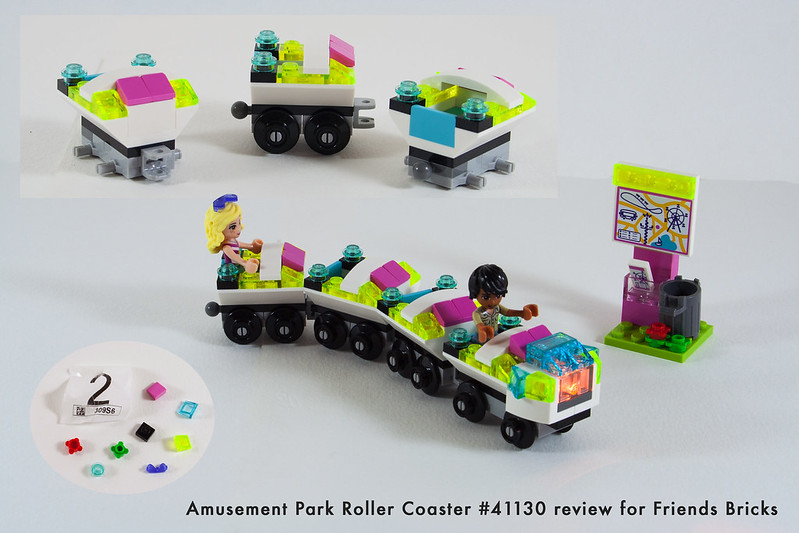
We then build three other carts that attach nicely to the lit up front row one. This is all of bag number 2 with spare parts.
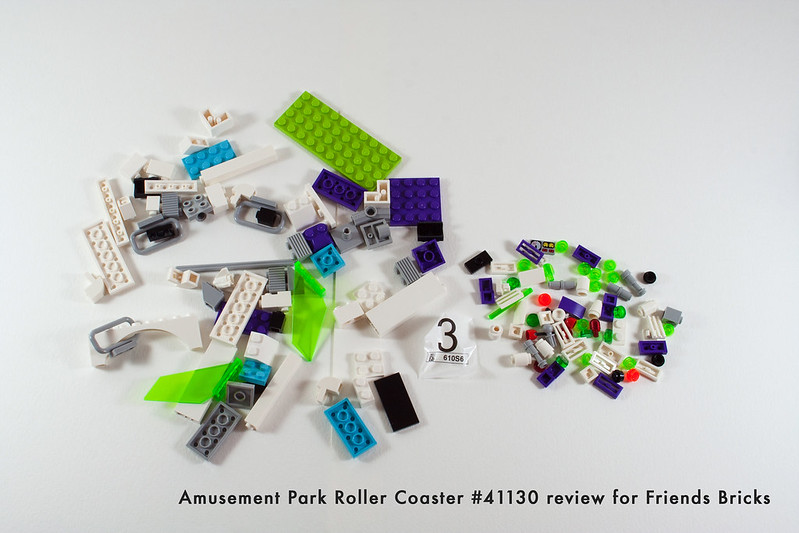
Move on to number 3. It's getting spacey, what an interesting color scheme!
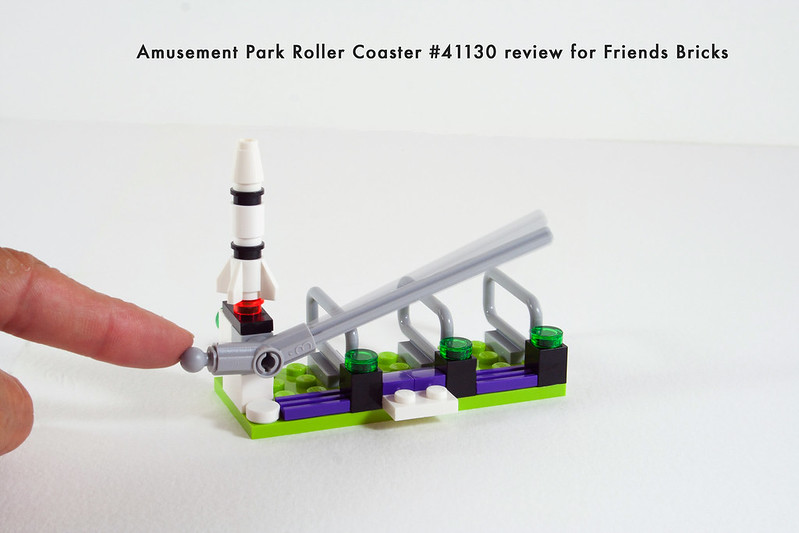
I didn't know what I was building here at first, but when I attached the three oval grey bars, I thought, this has to be the ride's waiting line!! Having spent much of youth at the now closed Pink Flag's Heartlake Mountain (name slightly modified) in Southern California, the amount of detail so far totally makes me reminisce of the good old days! I feel like I'm there already!
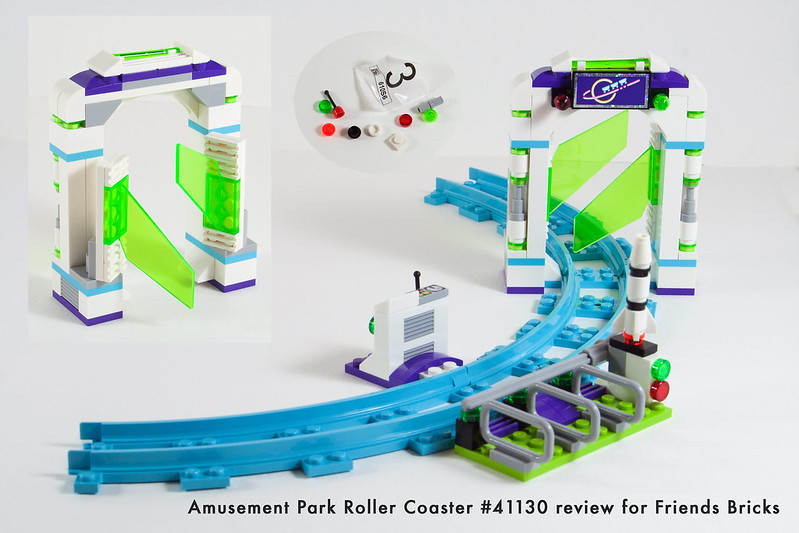
We then build some kind of door or portal, and start attaching some blue rails. As I'm starting to build the roller coaster, I have never been so excited in my life! I already want to modify this set. If only I had the energy, the patience, the time. Technically, I could never conceive such a playset, but esthetically, there are a few things I would like to change. But before I start daydreaming, maybe I should go back on track and continue building, there is still a lot to do!
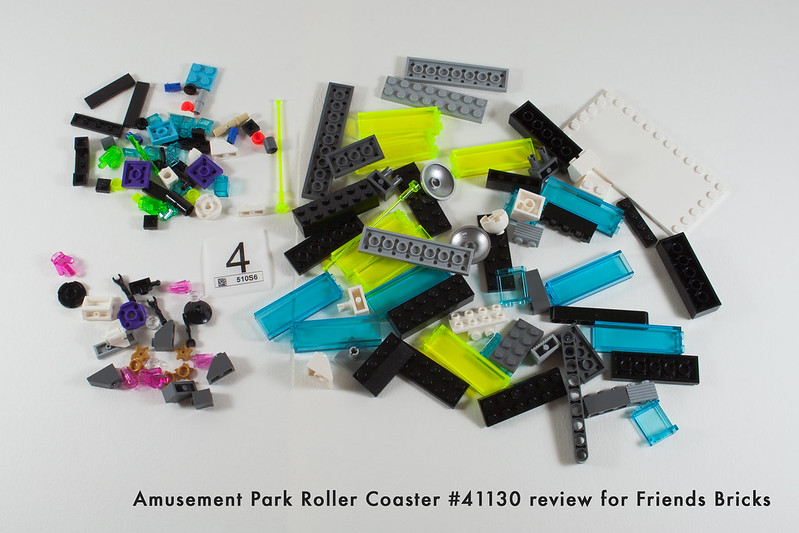
We now open bag number 4. I really wonder what we're about to build.
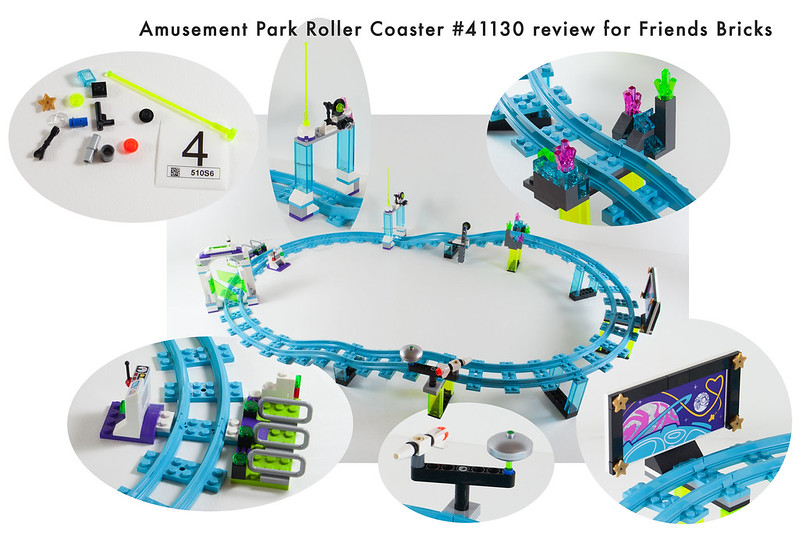
And... let's skip the suspense. Along with all the remaining rails, we finish the whole entire ride. There is a camera ready to snap you at the top of your thrills, a rotating rocket, a moutainous area... and of course a few spare parts. I have to admit, the ride doen't look quite as scary as what I remember from my youth, but it's plenty to play make believe!

I'm moving on with an all-in-one kind of picture. On the left, all the parts in bag number five, in the center spare parts. And on the right, the swirl ride! Technic pins were not were I expected them to be in the end, there are quite a few here. Well, everything is relative... This is a very sturdy build, and that's good, because swirling up and down puts intense pressure on the pink stand.
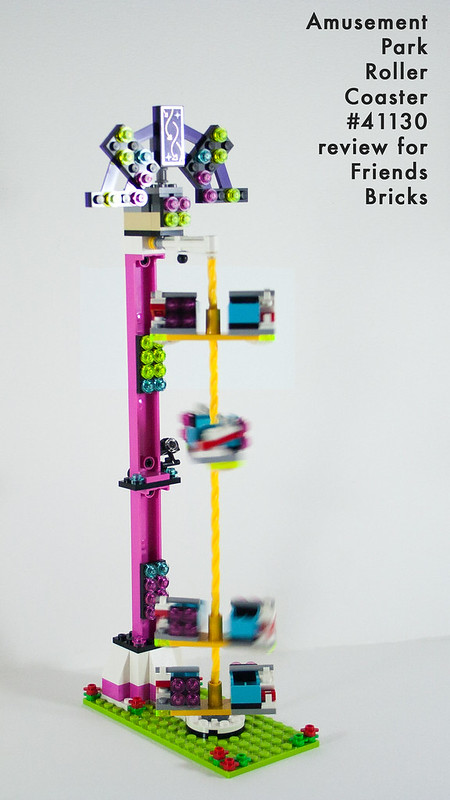
This is not a blog friendly photograph, but I enjoyed playing around to show you some of the swirly action. I'm not too good with videos, so I hope this gives you a good idea.
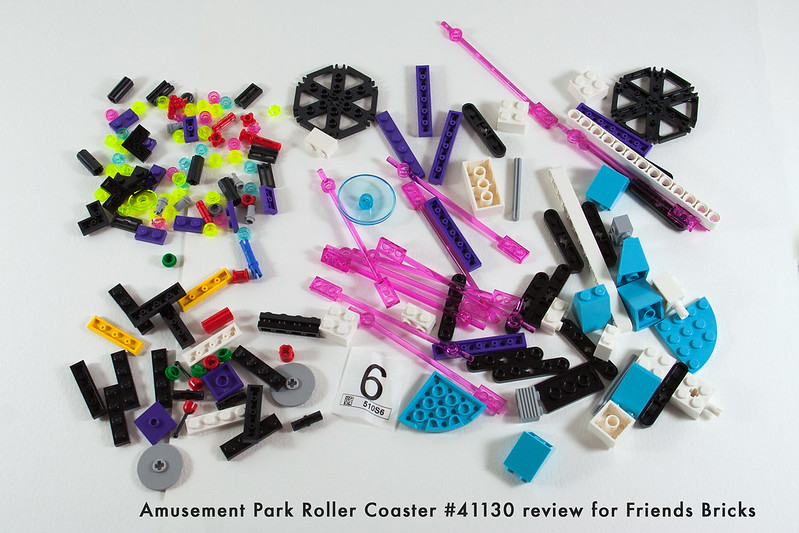
We are already at bag number 6. We've built quite a bit so far. Look at all those transluscent pink bars! We've seen them once before in the rehearsal stage (#41004).
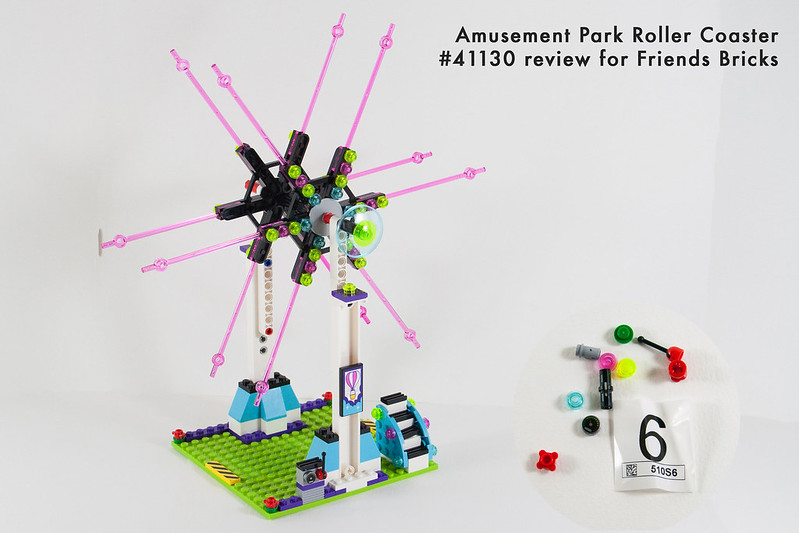
And the bars are used to make what looks like a ferris wheel. The construction of it is complex but easy to follow. Already you can make it turn if you wish, and you know you do!! As for the swirly ride, the foundation is very sturdy.
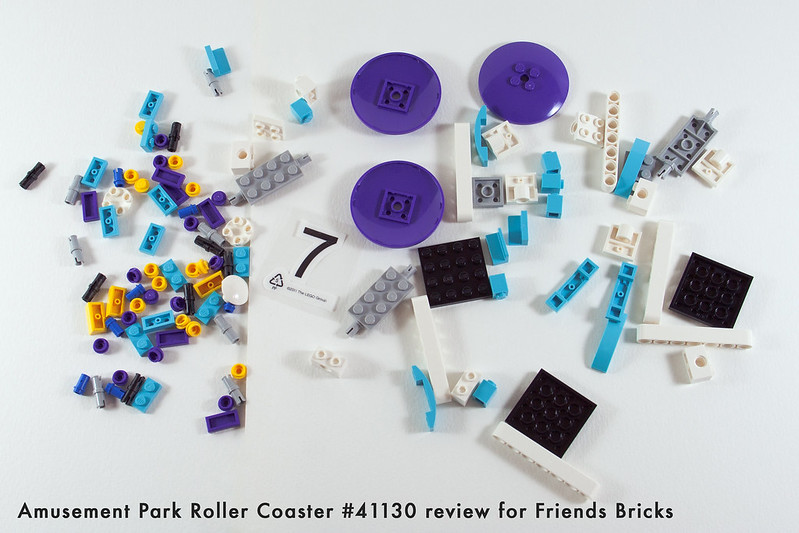
Bag number 7. Purple, blue and yellow, I like that! Notice the 6x6 purple radars.
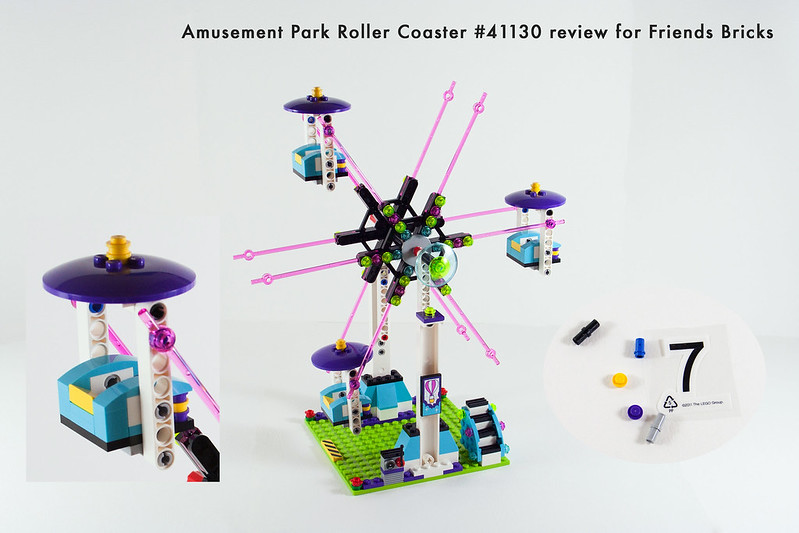
All of bag #7 is used to make three identical ferris wheel carts. You can see a close up of how it is then attached to the frame, and spare parts.
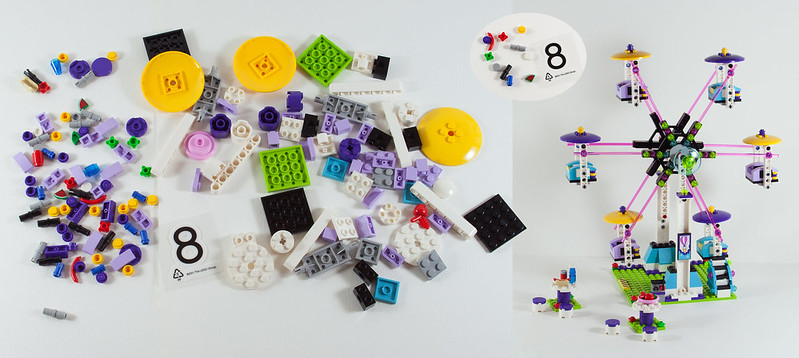
Another all-in-one photograph. Contents of bag number 8, spare parts, and final result. It seemed like this bag was a little heavier than the previous one. I really like the purple and lavender carts. The same radars also come in yellow. What made the bag heavier is what is used to make two little side tables with chairs. You can't see too well on the photograph, but on the tables are a really cool bottle water (we've seen that mini build before, but I still find it mind boggingly realistic), an apple, a soda, one of the new hot dog buns, and two new watermelon slices. We will get a closer look at them later on.
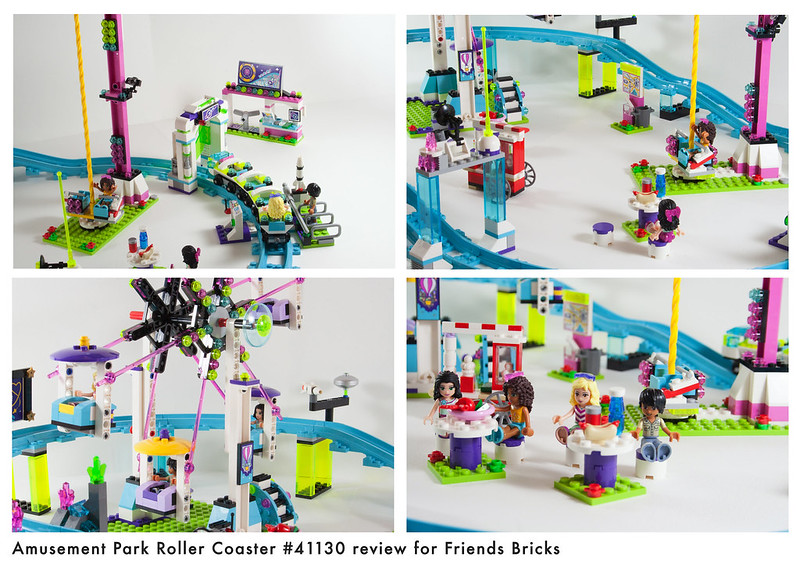
Oh wait! That was the last bag! We are all done building! Here are some park details for your eye pleasure. The park seems a little empty with only four people in it. You may want to add some of your other minidolls or classic minifigs to make it a little more lively. If I ever get to modifying this set, adding people will be high on my list.
Whee!!! It would also be nice to motorize the roller coaster. I am really not good with that, but I know of a few people who may be able to help. In the mean time, when you push the carts forward or when you pull it, either way, it doesn't stay on the rails, it keeps derailing. Maybe with a motor, a more regular force would keep it on track. As is, it is very loose.
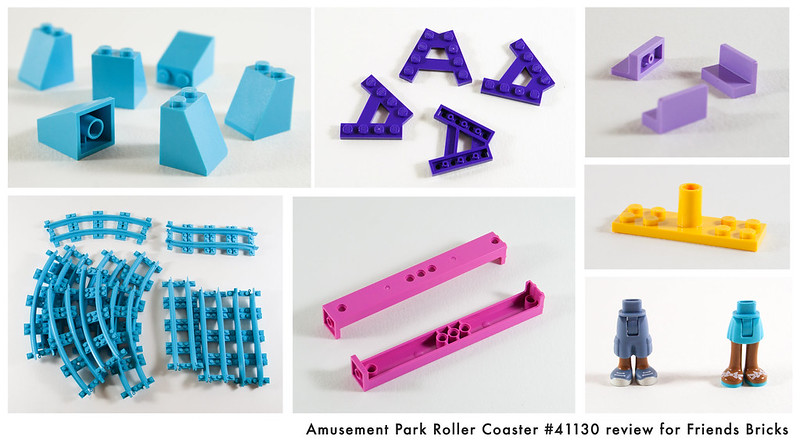
Let us now take a closer look at parts. The ones above are unique to this set. The yellow part is a new reference this year and comes in yellow only here. The other parts are just new colors.
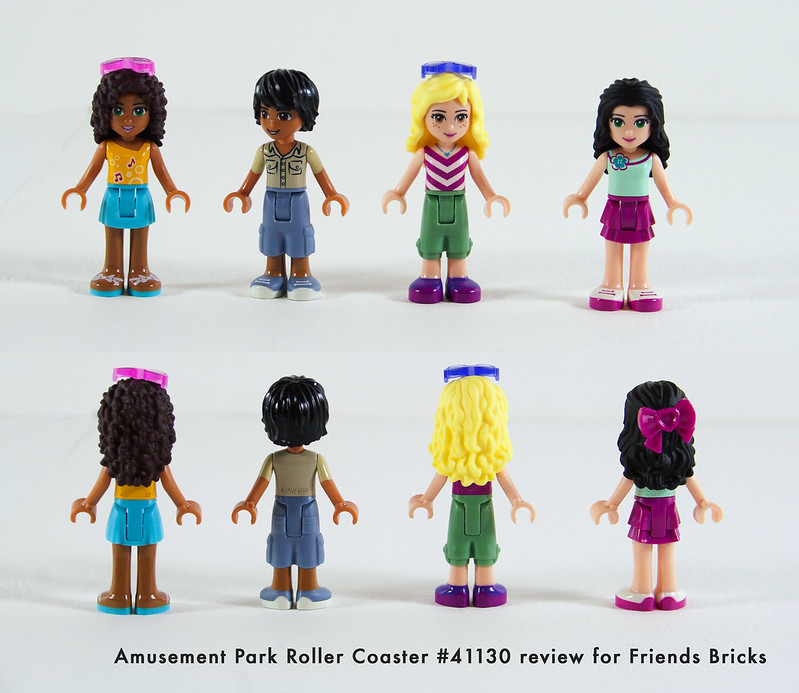
You always need a good picture of all the figurines in a set. All together, from left to right, Andrea, Matthew, Naya and Emma.
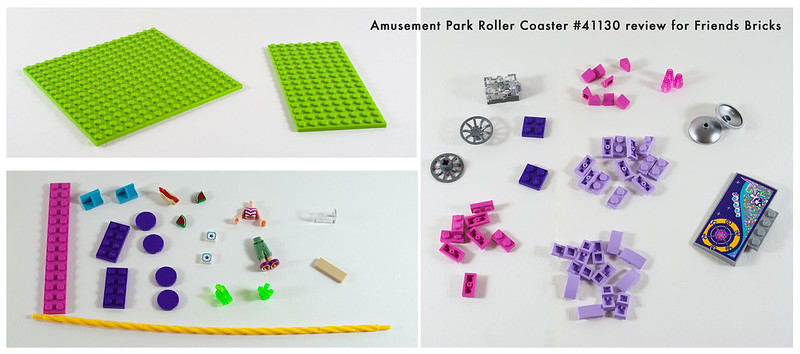
There are plenty of other cool parts in this set. All the parts on the two left pictures are new this year, but not exclusive to this set. You finally get a closer look at the watermelon and park tickets. There was a spare yellow swirl bar, but I fear there may not be one in boxes purchased in regular retail. That has happened before with weird parts in sets I bought in different stores. On the right, these parts are by no means new, but they are anything but common. For example, the trans pink cones were found before in Star Wars sets, the dark pink cheese slopes in the Lego Movie's Cuckoo Palace...
All in all, that was a really fun set to build. It is full of surprises from beginning to end. It has neat pieces, but it makes me want to build a theme park of my own, using this one as a structure, rather than put away the pieces like I usually do. It is a big set with a price tag that goes along with it, but I highly recommend splurging if you have anything to celebrate, it is well worth it.
This set was provided by the AFOL Relations & Programs team (AR&P) of The LEGO Group for the purpose of sharing set details with fans.
Opinions provided here solely reflect those of our reviewer.
Photographs are property of Friends Bricks and are not directed by TLG in any fashion.
Wow! Not that I didn't know it already before, but this is a big set. I believe it is the main attraction at the amusement park this summer. I will do my best in showing you all it has to offer, but as you can see from the box, there is a lot going on!!
Let's open up the box and find no less than eight numbered bags plus two other bags! The instructions are also in a bag and there are two swirly yellow bars as well. Somehow I have a feeling there will be a lot of technic pins! Notice how bags numbered 7 and 8 are the old fashioned ones. Well, they are not that old, but I guess TLG must still have some unused leftovers in their factory stock.
For once, and surprisingly for such a set, there is only one booklet, a nice sturdy heavy one. And as good as new since it was protected by the plastic bag along with a single sheet of stickers.
I am usually not the one to check the booklets in details to look at ads and all. But I was pleasantly surprised to find an electronical device warning, those are not too common in the Friends theme. You can see what it's about in the top left corner, but we will go over that later on.
Here is the first bag with it's inner bags. There is one brick separator. We start with two minidolls, Andrea and Emma.
Top left is what we start building at the very beginning. Funny how we start right away with dinero (that's money!). Fear not, there will be plenty to eat, but first, you must walk through the main entrance and pay for those adorable park tickets, the two 1x1 printed tiles. I love how the window on the Popcorn cart opens up and those white hinges are not too common. I'm already thinking this so cute!!! Let's continue on... I still find a shame that minidolls' hands don't turn and I had difficulty positionning Andrea...
But I managed to figure it out! Here is all of bag 1 completed along with spare parts. That's a lot of spare parts, don't you think? So far, I think the amount of detail is pretty incredible. I want to take a picture of every aspect, but I know there will be a lot, I might have to skip one or two.
Let's move on to bag number 2, it's getting technical, I see some good old Mixel joints! We start with two more figurines, new friends Naya and Matthew.
We can finally take a look at the 2x3 light brick. This is what all the electrical fuss was about. Do not throw away with regular trash. I'm not planning on doing that.
Speaking of trash, we first build a cute little stand with park map, a brochure, and... guess what, a trash can! We then use the light brick to build what looks like a cart for the main attraction, the roller coaster. You kind of have to force figurines in place, but see how Naya lights up the brick when seated. I like the fact that for once, minidolls stay seated in place without the use of the usual 1x2 panel with center divider, that we always find in cars.
We then build three other carts that attach nicely to the lit up front row one. This is all of bag number 2 with spare parts.
Move on to number 3. It's getting spacey, what an interesting color scheme!
I didn't know what I was building here at first, but when I attached the three oval grey bars, I thought, this has to be the ride's waiting line!! Having spent much of youth at the now closed Pink Flag's Heartlake Mountain (name slightly modified) in Southern California, the amount of detail so far totally makes me reminisce of the good old days! I feel like I'm there already!
We then build some kind of door or portal, and start attaching some blue rails. As I'm starting to build the roller coaster, I have never been so excited in my life! I already want to modify this set. If only I had the energy, the patience, the time. Technically, I could never conceive such a playset, but esthetically, there are a few things I would like to change. But before I start daydreaming, maybe I should go back on track and continue building, there is still a lot to do!
We now open bag number 4. I really wonder what we're about to build.
And... let's skip the suspense. Along with all the remaining rails, we finish the whole entire ride. There is a camera ready to snap you at the top of your thrills, a rotating rocket, a moutainous area... and of course a few spare parts. I have to admit, the ride doen't look quite as scary as what I remember from my youth, but it's plenty to play make believe!
I'm moving on with an all-in-one kind of picture. On the left, all the parts in bag number five, in the center spare parts. And on the right, the swirl ride! Technic pins were not were I expected them to be in the end, there are quite a few here. Well, everything is relative... This is a very sturdy build, and that's good, because swirling up and down puts intense pressure on the pink stand.
This is not a blog friendly photograph, but I enjoyed playing around to show you some of the swirly action. I'm not too good with videos, so I hope this gives you a good idea.
We are already at bag number 6. We've built quite a bit so far. Look at all those transluscent pink bars! We've seen them once before in the rehearsal stage (#41004).
And the bars are used to make what looks like a ferris wheel. The construction of it is complex but easy to follow. Already you can make it turn if you wish, and you know you do!! As for the swirly ride, the foundation is very sturdy.
Bag number 7. Purple, blue and yellow, I like that! Notice the 6x6 purple radars.
All of bag #7 is used to make three identical ferris wheel carts. You can see a close up of how it is then attached to the frame, and spare parts.
Another all-in-one photograph. Contents of bag number 8, spare parts, and final result. It seemed like this bag was a little heavier than the previous one. I really like the purple and lavender carts. The same radars also come in yellow. What made the bag heavier is what is used to make two little side tables with chairs. You can't see too well on the photograph, but on the tables are a really cool bottle water (we've seen that mini build before, but I still find it mind boggingly realistic), an apple, a soda, one of the new hot dog buns, and two new watermelon slices. We will get a closer look at them later on.
Oh wait! That was the last bag! We are all done building! Here are some park details for your eye pleasure. The park seems a little empty with only four people in it. You may want to add some of your other minidolls or classic minifigs to make it a little more lively. If I ever get to modifying this set, adding people will be high on my list.
Whee!!! It would also be nice to motorize the roller coaster. I am really not good with that, but I know of a few people who may be able to help. In the mean time, when you push the carts forward or when you pull it, either way, it doesn't stay on the rails, it keeps derailing. Maybe with a motor, a more regular force would keep it on track. As is, it is very loose.
Let us now take a closer look at parts. The ones above are unique to this set. The yellow part is a new reference this year and comes in yellow only here. The other parts are just new colors.
You always need a good picture of all the figurines in a set. All together, from left to right, Andrea, Matthew, Naya and Emma.
There are plenty of other cool parts in this set. All the parts on the two left pictures are new this year, but not exclusive to this set. You finally get a closer look at the watermelon and park tickets. There was a spare yellow swirl bar, but I fear there may not be one in boxes purchased in regular retail. That has happened before with weird parts in sets I bought in different stores. On the right, these parts are by no means new, but they are anything but common. For example, the trans pink cones were found before in Star Wars sets, the dark pink cheese slopes in the Lego Movie's Cuckoo Palace...
All in all, that was a really fun set to build. It is full of surprises from beginning to end. It has neat pieces, but it makes me want to build a theme park of my own, using this one as a structure, rather than put away the pieces like I usually do. It is a big set with a price tag that goes along with it, but I highly recommend splurging if you have anything to celebrate, it is well worth it.
4 comments:
This set is super cool!!! Plz comment if u know when the summer 2016 sets r going onto the friendsbricks site?? Thanks!
Wow! Their is so much more in this set than I expected! Great review. Thanks for sharing. :)
OMG! The roller coaster is awesome!
Yes, Avery, the sets are on the FriendsBricks site: http://friendsbricks.com/FriendsSetsSummer2016.html
Enjoy!
Post a Comment
Note: Only a member of this blog may post a comment.