Ready to Launch her dream of being an Astronaut, Olivia is on the crew walkway to board the Space Shuttle!

"Astro Olivia" is suited up and ready for space!
Her spacesuit is new and unique to this set in its vibrant coral and dark blue logo with silver accents.
Dr. Vidya is the Space Academy Administrator and astrophysicist. She is a new mini-doll character for 2022.
She
has the same space logo on her blue shirt, a printed microphone, hard
plastic hair piece, and a fabric printed shirt back under her lovely
long black hair!
First
we build the multi-axis trainer -- also called aerotrim -- which is a
3-axis gimbel. It is used to test an Astronaut's reaction to
disorientation; then help train their mind to be able to function while
oriented in any position.
Using the newly recolored in white
11x11 Technic circle beam with cross holes, we create 2 of the typically
3 planes of rotation. A third would be similar to how the circle beam
was used in Magical Funfair Acrobatics -- where it is rotated along its
rim by the turning of the float platform's wheels.
Olivia in the multi-axis trainer being monitored by Dr. Vidya.
Using
the purple splat gear on the right, you need to flick it quite firmly
and fast to get the rotation of the ring; the seat will swing -- yet not
quite a full horizon rotation. Still, it's "silly fun" to gear it up according to
the set designers.
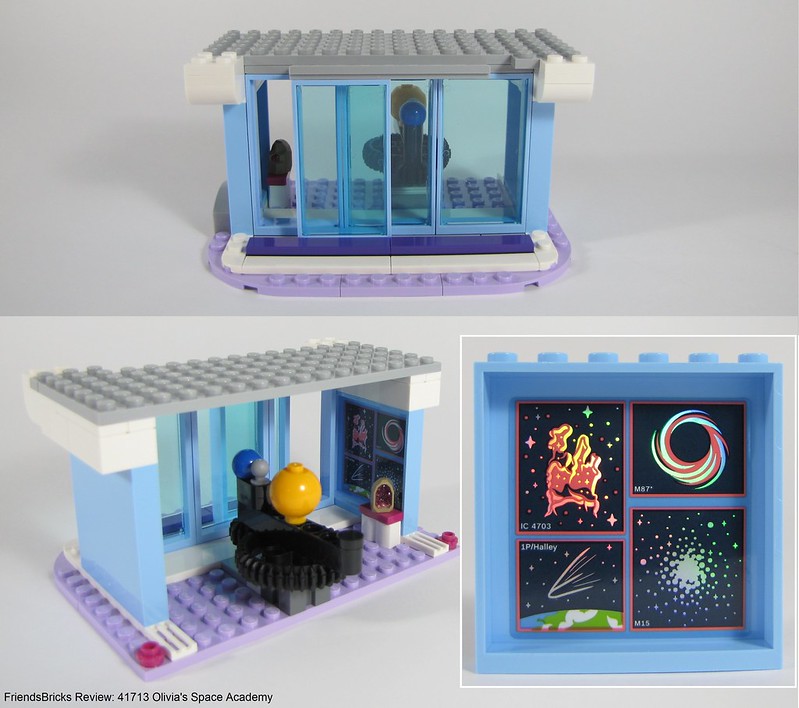
Next is building the Observatory shell using newly recolored 4x4x6 round wall element in Light Royal Blue.
The interior platform that rotates has a monitor of space images from the telescope.
Observatory core fits into the shell for 360-degree rotation. The telescope can swivel about 45-degrees to straight up.
Sticker
of constellations, which are said to be accurate, are meant to go on
the curvy exterior. The color isn't really an exact match. I had
thought they where white on clear backing when looking at product images, yet all stickers here are on an
iridescent foil type. Even the product images have them a wee bit
crooked; considering it is tricky to place on curves -- I opted out. I
think they would be better used on a wall or sealing somewhere -- as
they are nice and silvery!
The
finished Observatory (minus star chart and shiny star stickers) allows
the interior to rotate closed for better sky and monitor viewing.
The
instructions are a bit vague and only show setting a minifig Camera
element into the clear foot tray. They don't direct us to attach it to the
view finder end of the Telescope -- yet it can somewhat be seen in an
image -- which I nearly missed. This camera is what will feed images
into the computer.
Let's meet William - another new mini-doll for 2022, and Olivia's fellow Astronaut.
His
has the same hair as another previous Astronaut in the City theme. The
gold visors in this set are somewhat rare -- also in other dedicated
space sets.
Starting
on the academy building, we build a Tellurion -- which is a mechanism
that depicts how day and night are caused by the earth on its axis and
orbit around the sun. As the Sun, the 2x2x1 2/3 with knob double sphere is newly
recolored in flame yellowish orange.
We also add a Geode (from space, yet is the same as Friends Alpaca Mountain) that must be studied.
The
bottom floor is finished with a wall of images that represent actual
images Astronauts and other NASA equipment have captured in space!
Labeled with names and areas of space -- these are valuable stickers.
The wall panels are newly recolored in Light Royal Blue.
The entrance is a sliding door; shiny star stickers can go on it and tall windows.
Julian works as a Mission Specialist and has a similar type of uniform as Dr. Vidya. You can see the shirt back print.
His Movie Theater projector job must have helped him train for this. He has hard plastic hair and silver-rimmed glasses.
The
second level is built directly onto the first -- so it's not a modular
building. The wall hosts a whiteboard upon which real math and
astrophysical equations are represented on a sticker.
The
virtual-reality trainer is used to teach Astronauts about complex
adjustments needed for their craft in space. Just like real astronauts.
It uses the VR ocular visor with a while helmet.
The Microscope with a space sample, a model Rocket and a Drill are on the table for other preparations for spaceflight.
A close-up of that table and the round "petri dish" microbe tile. It's not new, yet somewhat rare.
Switching
to the front of the academy, we build the Sun and prepare clips for the
planets closest in our Solar System to be displayed.
Using
round sign with snap parts and 3x3 tiles, both newly recolored in black,
we attach the planets to the warm gold flex tubes. Mercury, Venus, Earth, and Mars make a very
striking display in person!
Instructions have the builder attach them
first and then apply the stickers. I was concerned about getting the
stickers centered -- so I applied them and then attached via clips.
The curve of the tube slightly changes the orientation of the planet
sticker ... so I tried to adjust as well as possible.
The
top floor with Mission Control and the walkway arm get built next.
I've inset the walkway arm assembly which uses a newly recolored in
magenta 1x6x5 Lattice wall. The black gear piece is what we turn to extend and
retract it; it takes a couple 'in and out' sessions to get it seated properly. The
red stop part works great.
The rooftop gets 3 purple splat gears to help the 2 satellite dishes rotate to specific signal directions. Crew walkway arm in retracted position. On the right side of the building is the Technic pin assembly for attaching the Observatory.
A close-up of Mission Control.
The
front of the completed Space Academy. The vertical lettering is
iridescent shimmery and fun in person -- as the colors change by angle
viewed. Can you see the man in the moon?
A side view of the walkway arm retracted.
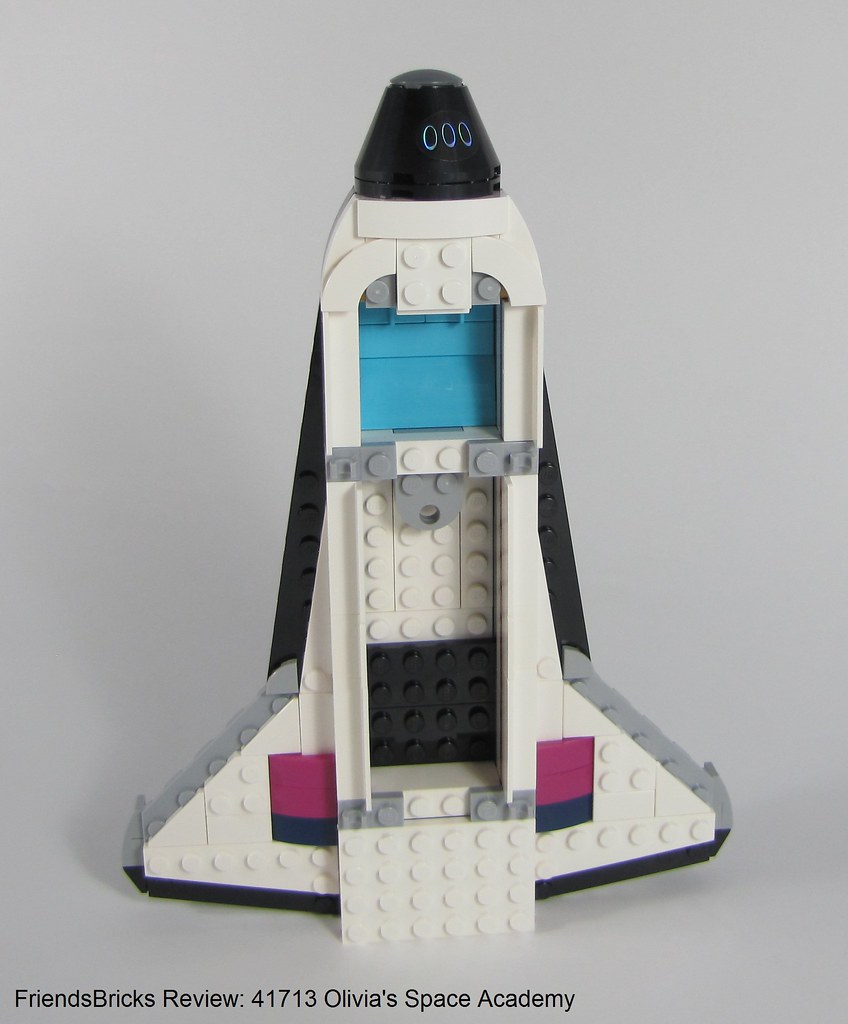
The heat shield tiled space shuttle bottom is built next -- using black inverted slopes, plus rare black 4 wide hull parts.
I've placed the nose assemble so you can see its construction.
The
Space Shuttle cockpit with azure blue seating that allows reclining for
lift-off, and fuselage get built after the wings. The astronauts
dashboard is nominal. The magenta and dark blue trim really sets it off
as distinct.
The aft cavity with a 1x4 grey tile gets covered with that white plate. It could be used to hide something.
At this point, it can stand on its own
The Canadarm is assembled for inserting into the shuttle cargo bay.
Next we build the small solar-powered drone camera for use in viewing the shuttle exterior.
After
attaching the drone to the retracted Canadarm, we build the cockpit/flight deck
roof canopy. The windshield and 2 white 3x3x1 1/4 sphere parts are rare and were used
in 2021's NASA Space Shuttle.
The orbital maneuvering system engine modules are built and attached at an angle. The tail rudder with sticker is attached, along with the 3 rocket thrusters.
Next
we attach the payload wall panels that hinge open. You can see the
airtight wall with window between the flight deck and cargo area.
NASA
stickers are placed on the sides. These are approved by NASA for TLG
to use; otherwise, this set wasn't a collaboration with the agency.
There is no official box indication.
Side view of the Space Shuttle that doesn't otherwise have a name. It is possible Astronauts name it ... 
Sitting on its mobile Launch Pad, this Space Shuttle look space-worthy to me!
You
can insert the center tile stud into one of the cone part/thrusters
anti-stud hole; otherwise it merely "sitting" on the pad -- so be
careful moving it.
Here
you can see the orbital maneuvering system engine assemblies attach to rocker-hinged plates firmly.
It takes a bit of push at the correct angle to get them fully connected.
They stay on very well.
Olivia decides to use her last face-time to chat with Mia at the Wildlife Rescue Center before boarding the shuttle.
William uses the VR training simulator on last time before flight.
Both Astronauts inside the shuttle.
Cheers to Space Cookies! The printed clear tiles are new for 2022 and unique to this set.
Cookies tucked away, it's time for Astronauts Olivia and William to board the Heartlake City Space Shuttle!
Julian checks the satellites before sitting at the Mission Control desk, while Dr. Vidya welcomes viewers for the Launch!
Box front:
Contains
6 parts bags; soft bag with 11x11 Technic circle beam, 2 plates, gold
flex tubes; instructions book (216-pages) with sticker sheet wrapped in
thin plastic, and 1 orange brick separator in a parts bag.
Mini-doll cameos on the box front, with Olivia having a space motif frame.
My
set box had its instructions book with sticker sheet rolled up -- so
I've tried to flatten for a photograph. The iridescence is fun in
person, and they are all nice graphics. I'm sure the target audience of
age 8+ will enjoy applying them all. Since I plan to re-use my parts
for future MOCs, I didn't apply -- yet I also don't think it detracts
from the build.
Box back:
Scene from Space using the extended Canadarm!
I've
mentioned most recolored or rare parts -- visit LEGO's instructions
page for full list. The 216 page book also has a few new aspects to
convey building steps.
Instructions book cover:
New format without the glossy box art.
Summary:
Fun
to build while thinking about space flight and exploration. Even though the NASA
shuttle program ceased in 2011, it's still a huge influence on aerospace
technology and developing concepts to empower the future. Failure and
success is how we proceed. It's the same with learning the techniques in
this first Space set for Friends -- always learn from the designers to
then try something new on your own.
Photographs are property of FriendsBricks and are not directed by TLG in any fashion.
---

3 comments:
Love this set. It is definitely time for Freinds on space!
Seems obvious that the space shuttle should be named “Friendship” right?
I absolutely love this set! I was looking forward to it since I saw the first pictures. I just hoped LEGO would release a whole subtheme about space.
Post a Comment
Note: Only a member of this blog may post a comment.